Showing posts with label peyote. Show all posts

8/24/2026

Kites and cubes - The big ones

A week ago, I posted about using tiny 1.8 mm cube beads for a kite shape and announced this post about using the 3 mm cubes.
These bigger beads and I have a bit of a fraught relationship. When I started out crocheting and then knitting with wire, a friend told me that she had big cube and triangle beads which would be just perfect. They were leftovers from her beading days - that should have been a warning, if she didn't know how to use them, how would I? - and she would make me a good price.
In the end, I gave in and literally regretted it for years. The triangle beads were easier to use, but the cubes - there were loads and they were too heavy to use really many of them in pieces of jewelry ... I can't even tell you how often I tried something and ripped it up again. Finally, I used quite a few in my "pineapple slices" aka Christmas ornaments.
 

One experiment from when I also started bead looming was using them for that. Where the tiny cubes worked quite well, though, the big ones just didn't look and feel right at all.
Eventually I cut up the one bracelet I had made and the big tube of beads went back into the tin with all my tiny cubes where I found it again now.
Years ago I had a regular "tackle that stash" day on my blog to motivate myself to use up really old supplies - maybe it was time to tackle this bead tube ...

So this is how these two pairs of earrings were created (and now there are only about a dozen beads left which I call success).
I'm sure you have seen the earrings which have a beaded triangle on top, sometimes a diamond with four sides of the same length, in one or more colors, sometimes with a pattern, and a fringe.
 
My own "Jaws" design

This is the same idea, only with "cube kites".
For the fringes I dug into my stash of tiny crystals - and promptly threw a bunch of them all over the place 
😂
It's difficult to catch in a picture, but I quite like the contrast of matte and sparkle.
Which version do you like better?


8/17/2026

Kites and cubes - The tiny ones

K was a kite
Which flew out of sight,
Above houses so high,
Quite into the sky.

(From the Nonsense Alphabet
by Edward Lear)


I love tiny cube beads, so when I was able a few years ago to get a surprise assortment at a sale price from one of the bead shops I order from, I jumped right on it.
Then I remembered that as cute as they are, I always struggled a bit what to do with them. I loomed with them (the result is stiffer than with seed or cylinder beads) ...


... I wire knitted with them (so slinky) ...


... I did peyote with them, in the round and folded ...


... and I still had a box full of cube tubes (this wasn't even everything I made).
So when I came upon a quick tutorial for a beaded diamond kite shape, I thought I'd give that a try (this isn't the only tut for it, it was just the first popping up in my recommendation, but it works well) with cubes instead of cylinder beads.
I first made a test piece in Delicas and immediately decided that instead of the original design I wanted to make some variations, ripping up the test piece again.
These are the results so far.

The kite shape made me think of Art Deco patterns and inspired this design. Simple but with a bold color combination.


One theory is that kites have their name from the hovering birds of prey. In German, however, we call the bird "Milan" and the tethered flying object "Drachen" after dragons.
Inspired by the name, I beaded a smaller version of the design and added dragon charms. Readers who have been around for a while know I can't resist a nice dangle and I love these 3D dragons!


I also tried a pair of earrings using just the open V shape in a combination of clear, pearly white, and matte black cubes.
While I liked the color combination, I wasn't completely happy with the overall look and will be playing with that some more.

Delicas as used in the tutorial are very uniform beads, the cubes not so much although I cull the ones that are way too big or crooked. So it was a nice surprise how well it worked after all.

Cubes also stiffen the design a bit which isn't a bad thing for earrings.
These beads come in different sizes, so expect another post with some "big ones" (3 mm instead of 1.8).

3/29/2026

"Die Herren Pudels"

"Die Herren Pudels" is not correct German if you wonder (it ought to be "Pudel"), it's an affectionate nickname for my favorite poodles. You could translate it as "The Misters Poodles" (staying in line with the wrong grammar), but they would probably prefer the translation "The Masters Poodles" because masters they are - Kosimo and Nemo Black Power vom Glashütter Täle.
Their humans have helped me out more than once, and as I had still one of my small bottles standing around, I thought I'd bead a poodle bottle for them as a little thank you.

I looked at poodle drawings and silhouettes online to get a feeling for the outlines and then made my own pattern of Kosel and Nemo looking at one another. So far so good.
As they are white despite their name (more on that later), I wanted a dark background. I hadn't thought it through completely when I chose gunmetal for it, though, which I noticed when I came to their black noses. I was not prepared to rip up rows and rows of beads. In the right light you can see the noses, but they don't look quite as pointy as they would have with a better contrast which actually works quite well. Lucky me.
It didn't work as well for the collars. The heads kind of looked as if they were floating, so I actually had to rip out those few rows again. I went for slimmer collars in a dark red instead.


No fancy fashion poodle haircuts on these two!

On the back I added a few hearts and a few silver beads.


If you have seen my other beaded bottles, you may have noticed a difference between them and this one.
Usually the beading goes all the way up over the shoulder and neck. I start on the pattern to make sure I position it right - some patterns are a full image which means I have background rows at the bottom or they show just a part of something like here where the poodles go all the way to the bottom - then I do the shoulder and neck and after that I finish the bottom which is never fully closed, by the way.
The bottles I have made so far are never meant to hold any liquid but mostly as decoration although I can put needles in them for example or something else that fits through the neck.

In this case, however, I thought it would be a cute little vase for a single blossom or also a few, such as daisies (as a kid, I liked to bring my mom tiny daisy "bouquets"). The poodle humans love plants.
So I stopped beading at the shoulder which means it's like one of those cooling sleeves now, you can just pull the bottle out if you need to clean it. I actually like the idea.


I felt that the beading needed a nice edge now, though.
Pink crystals were the natural choice because Kosel is 1. the sparkle master with his rhinestone on black collar (Nemo has white Swiss crosses on black) and 2. he loves pink. I have a pair of pink slippers standing in the hallway and he has stolen one of them more than once.


There was just one problem. I couldn't do a symmetrical edge because I have a prime number of beads. So instead it became an asymmetrical "crown" which fits the noble lineage of the master😉


Now the promised explanation for the name.
I have often wondered why some animals have such crazy names (cats are an exception, they deserve the most wonderful and craziest names there are), like horses or purebred dogs, and I don't want to miss out on the chance to tell you the names of Kosel's and Nemo's parents (with their humans' permission).
Kosel's father is named Decathlon Alfredo Magdalena, his mother Iska Black Power vom Glashütter Täle.
Nemo's father is Begin to Dream Love me Tender (a beautiful French poodle also called Merlin) and his mother is Kosel's sister Kosima Black Power vom Glashütter Täle.
The lady Kosel and Nemo came from actually used to have black poodles and then fell in love with the dark eyes of white poodles, but didn't want to change the name.

What's next?
Well, I have a plan, a WIP, and the beginning of a small experiment, so I can't even tell you what it will be, but I hope you'll be here when I can!

12/25/2023

Santa Claus and Rudolph - The twenty-fifth door


Has Santa Claus come by your house today and left you something from his sack of gifts? If not, I have a little Santa Claus and Rudolph here who are more than happy to step in - if they can find their sleigh.
Well, actually, there wasn't enough space for a sleigh.

I won't tell you a long story this time (please stop cheering ;-)) and let those two speak for themselves instead.
Merry Christmas!


12/13/2023

The Christmas pod - The thirteenth door


Sometimes I really wonder if it has become worse with age or if I was simply born being geometry challenged. It sure isn't a time at school I am thinking of fondly.
As I had made two part pod earrings before, however, I figured I would be able to make a pod from three components as well.
There are beautiful pod patterns out there, but I wanted to make my own. Nothing too big or complicated of course, after all I had to make three components.

So I played around a bit and drafted a little Christmas tree in  a pot, with lights on the branches, a golden star on top, a garland all around, and baubles.
The plan was to put the same pattern on every component, but change the colors for the garland and baubles - which would be nice for using up some stash.

After the second component I got bored. It was probably not a good idea trying to push it through, I messed the third one up royally.
First, I ran out of the blue mix I had used for the other two, but I just couldn't be bothered to put in a bead order just for  a few blue beads, and no one would notice the change in the background, right? After all, this was just a small pod for myself.
Second, the spirit bead - a wrong bead used on purpose because only the gods are perfect - in the garland wasn't so bad. Only it was not really a spirit bead, I just had missed it, it had been the middle of the night and I had been already bored and slightly annoyed. One wrong bead wouldn't show, would it (especially not in a sea of different blue beads).
Then came the real whopper. Although I thought I had checked very thoroughly, I had made the wrong halves and only noticed then when getting ready to zip up the last piece. As loud laughter of a madwoman is usually frowned upon by the neighborhood at 1.30 a.m., I took a deep breath and put everything away.

The next day I gave it another try. Success! Now I just needed to zip it up and ... what was that? A one bead bauble in the first component I had made?? Why hadn't I noticed that before? I was so ready to chuck this whole thing, but I had come too far already. So I broke out the two wrong beads very carefully and added the right ones.
So far, so good. Just zip up the last piece and ... why do all the pods I see always look so nice and smooth and full and mine looked, well, not wrinkly exactly, but just not as nice? Did I have to stuff it? Was my tension wrong?
I really had it by now. This was no fun anymore at all. What would it look like if I just squished it? It was strangely satisfying to do so, probably because I let all my frustration out, and to make it stay that way I even sewed the parts together in a few spots. It's no pod, but it actually looks quite cute.


This had not been the plan, however.
Incredible but true, after all this hassle, I decided to make a second pod and stuff it. An easy pattern, not taking chances this time.
Another little Christmas tree based on the last one, only symmetrical and no different colors for each component, either. No snow and just a different background color for each side.
I was so sure it would go wrong again otherwise, and then I would have to drown myself in the Fils, our little local river.

I know that you are now burning to know if I managed without mistakes the second time round and I'm happy to say ... no. You hadn't really expected me to say yes, had you? ;-)
I had to break out a few wrong beads again, but at least I know how to do that instead of having to rip it all up!


All sides.


And this will show you the difference of the backgrounds a bit better.


I doubt there will be another pod soon, but who knows? After all I said the same things about the puffy stars.

12/09/2023

Winter comet - The ninth door


The puffy star is back!
It all started with a large tube of bead soup, at least ten years old. I know many beaders hate bead soup, but I'm Swabian, and throwing beads away would feel like ripping my heart out, especially Delicas. I couldn't think of anyone to give it to, either.
It was easy enough to pour out the whole soup and pick out just the beads needed, though, mostly clear ones in this case. Bead soup doesn't scare me.

At first I had wanted to try something that didn't work out the way I had hoped, like so often, so I ripped it up again and made a winter comet instead, or maybe an ice comet.

The web tells me that comets have two main tails - gas and dust - and a coma.
Well, this comet has a baroque pearl and quartz tail because gas and dust are very hard to make from beads. Also a comet doesn't look like a puffy star, but artistic license and fantasy do wonders.
Just don't tell NASA about it.

12/07/2023

Chrismukkah - The seventh door


You never stop learning.
I have never seen the TV show The O.C. and had therefore  never heard about Chrismukkah if any of you should wonder.
The first time I actually stumbled upon this word was on a site not TV-related, that of the Jewish Museum Berlin which had a temporary exhibition on the theme from October 2005 to Januar 2006 called "Weihnukka - Geschichten von Weihnachten und Chanukka".
As there still seems to be interest in the topic, they put up a page with the key content which is also available under the English name "Chrismukkah - Stories of Christmas and Hanukkah".
Obviously the concept of combining both holidays - and giving this a name - had been created by assimilated German Jews in the 19th century. Via another article on Hey Alma, I got to a blog post by Jim Wald in The Times of Israel which touches on the question of assimilation and the consequences for the Jewish community in Germany.
As you can imagine, the idea of "Weihnukka" disappeared when the Nazis took over.
And then it was re-introduced it thanks to a TV show? No. I found at least one article about it before the show even started.
Do you have a story to contribute, maybe from experiences of your own?

There you have it. I promised you a crafty advent calendar and sneak in another story, but I had warned you this could happen.
Let's get to the creative part now.
Today's piece had been in the planning and making long before I jumped into the rabbit hole of Chrismukkah. For months, the title of my draft read "Hanukkah!!! - The seventh door (Star of David???)". A Star of David seemed achievable, but my own ideas were boring, YouTube didn't give me anything I liked, and most Google results didn't convince me, either. I kept putting this one off until after my first folded peyote pieces. Then I remembered a tutorial by KrisDesignFSP on Etsy from my first search.
I didn't follow the tutorial exactly. As you can see, I used two different colors for the both sides, but no different "edge" color, and I made the star smaller, both in width as in length, because I wanted to give this to a friend, as a pendant, should she want that, or for use as
an ornament. It was also important for me to ask her if she thought this was okay to show here.
The blog post mentioned above also provides links to articles on other Chrismukkah related things, such as the Hanukkah bush, by the way. That I had also never heard of. I doubt my friend has a Hanukkah bush, though.

Of course my first attempt was too small. I couldn't twist the peyote, combine the triangle, AND zip it up.
My second attempt was slightly bigger, but while the zipping up was not a problem anymore, stitching the triangles together wasn't so easy. You may notice that the star is not completely regular, but my friend is a very sweet lady and likes it as it is, phew! I don't think I could have done a third one ... although it was close as der Dekan actually opened up the cardboard box to steal the star. I caught him just in time, the furry little thief! ;-)


My first try didn't go to waste, by the way. I turned it into a pair of earrings.

And now happy Hanukkah, my friends!

12/05/2023

Beaded candle - The fifth door


I own real candles, but can't remember when I actually lit one the last time. I never trusted (some of) my cats around open fire that could be knocked over.
The two candles on one of my cupboards are constantly crooked because one or the other tail keeps hitting them.
So instead I have fake candles with a wax surface and LED "flames".
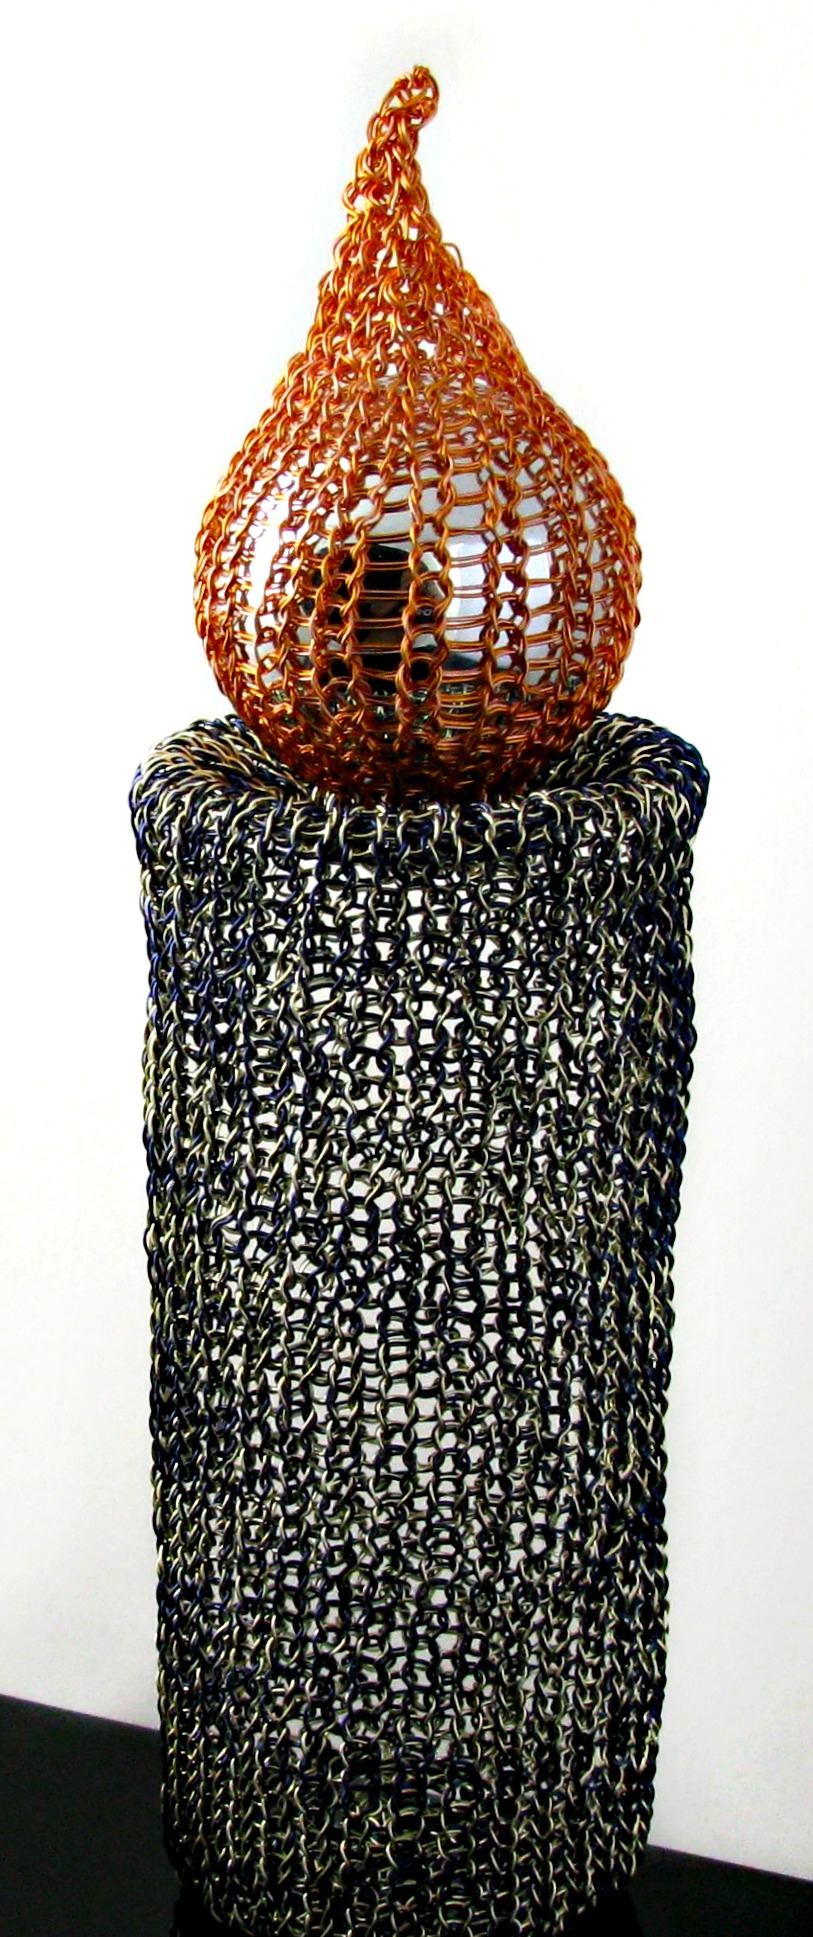
When I started wire knitting, I also gave some candles a try. The long ones that I made first are difficult to put up because they tend to bend over, wire crochet would probably have been sturdier.
I also made a bigger one that stands well on its own, though, as it is wider and made from two wires. To make the "flame" shine, I put a small Christmas bauble inside. These pictures from a previous advent calender give you an idea of its size.


This time, however, I wanted a beaded version.
I used 8° pink lined crystal seed beads to bead around a small wooden dowel in peyote stitch. Two layers of metallic golden seed beads and a disk at the bottom make up the little candle holder (actually I had run out of the pink beads and had to think of something, but this is supposed to be a bit of challenge after all).
A flame of red and a very light transparent brown and voilà, here's your Christmas candle!
It can stand on its own or can go on the tree.

7/22/2023

Folded peyote

I had seen earrings in the folded peyote technique before, but only now I had a reason to take a closer look, a reason I won't go into yet, though.
For those who want to try themselves, I recommend this YouTube tutorial by Anzu Crafts. She uses big beads which makes it very easy to follow and her explanations are really good even if you should be a beginner at peyote.

Of course I wasn't happy with just making the folded peyote, I also had to add some extras.
The shiny pink and luster purple pendant, for example, is embellished with tiny silver seed beads and for contrast it got a darker Polaris bead dangling in the center.


For the earrings I wanted a gothic look, so I used black with the luster purple and added spikes in the color "crystal vitrail light" for an edgy look.
Depending on the angle of the light, they appear clear or, thanks to the coating on the back, in a soft purple which goes beautifully with the purple Delicas. I am in love with those spikes and have quite a stash, so be prepared to see more of them in the future.

3/18/2023

Clumsy Saturday

It's one of those days. Actually, it has been one of those weeks. If this keeps going, I'll probably get eaten by my cats tomorrow.

That's why I can only share two pairs of earrings that I made this weekend. The third pair is unfinished yet because I cut my index finger like an idiot, and now I have to move my hand at an awkward angle if I try to bead which makes my wrist hurt which then makes my elbow hurt - long story cut short, I gave up for now.
It has been fun digging through my bead stash, I hadn't done that for a while. I think there will be more variations of these earrings once my finger is up to it again!


12/08/2022

Puffy stars - The eighth door


The things I'm doing for this advent calendar!
For years and years I have been resisting the beaded puffy stars, however pretty they may be, for several reasons.
While I have slowly begun to dip my toe into the waters of off-loom beading more and more (mostly because I still don't trust a certain tabby cat around my loom), I still consider myself to be quite the beginner and creating structural pieces is completely new to me.

Another reason is my lack of patience for video tutorials that are longer than five minutes (which says a lot more about me than about the tutorials!), but also knowing I wouldn't be able to make the stars without one.
Last but definitely not least these stars are made of five components. You know how much I struggle with even making a pair of identical earrings. FIVE identical components??
I know. I could make this much more interesting by going for a more complicated pattern. Excuse me while I am once again laughing madly.

For the sake of finding enough topics for this advent calendar, however, I jumped into the very cold water of puffy peyote stars after all, with two different randomly chosen tutorials, this one by Bronzepony Beaded Jewelry and this one by Off The Beaded Path.
My first attempt came out a little more squishy than intended, but is still pretty.


Then I almost lost my mind over my incredibly simple "pattern" of the first star I did in all-Delicas. I very quickly abandoned the idea of making these as Christmas gifts for our vet practice. Maybe for next year if I make one a month? ;-)

All in all, I'm happy that I tackled this personal challenge and got it out of my system for now.
It's crystal clear to me, however, that I will never make a star with a more complicated pattern or a much bigger star even if in a simple pattern. There are projects that are much more interesting to me.


Nevertheless, I could muster the patience for more than just two stars even if the only reason for that was a phase during which I seriously lacked the motivation to do much else. Stars to the rescue, who would have thought? I only played with colors and small sizes, however, not with patterns. Again, that will not ever happen.
So here's my little collection now. Some became gifts, some went into my decoration after I had taken the pictures for the first day of this calendar.


What became painfully obvious to me again, though, was that I obviously have no natural geometrical understanding at all! I guess my math teachers never stood a chance.

10/08/2022

Rulaman and the mookaite "teeth" necklace

When I was a child, I had one favorite book, well, among all my other favorites ;-) You can tell from how the book looks that it has been read a lot of times. That book is called "Rulaman" and was written in 1878 by David Friedrich Weinland, a German zoologist.
The youth novel is set in the times of the cave people who used to live in our area. While not being without flaws, after all research has continued, it has everything, love, fights with the people from other caves and with dangerous animals, everyday life, betrayal, revenge, birth, death, travel - and the "old Parre", the oldest woman in the family.
I have always been a fan of hers, she's tough until the end.

Illustration from the book (by Heinrich Leutemann)

Now what does Rulaman have to do with a new necklace of mine?
In the book there is one chapter on how the group hunts the dangerous cave lion responsible for the deaths of many family members. His fangs are given to the bravest men. At the time I thought that was utterly fascinating. Today it would probably make me sad.

I had these mookaite "teeth" around for a while. I tried more than once to wrap them in wire, but it never worked out. They were too wide at the top to make a nice wrap, and the shapes, though similar, weren't the same, the bead holes were crooked, at one side instead of through the center, sometimes higher, sometimes lower - I just didn't like the look.
Finally I had an idea, though. How about bead caps? Or even better, to accommodate to the different shapes and bead holes, how about bands of peyote to hold the stones and little "handles" on top which I could make longer or shorter depending on how much of the stone looked out?


It worked like a charm. I used a mix of copper plate and galvanized berry Delicas for a bit of contrast. Galvanized beads are always a risk because the color can rub off, so a silver color is looking through. Using a mix from the start, the small spots where the silver is shining through contribute to a vintage look rather well, I think.
I finished 15 "teeth" before I ran out of beads. I still have more of the stones, however, maybe I'm going to combine them with a different Delica color.
For the chain I chose an antiqued copper tone rolo chain.
Aren't the colors of the mookaite beautiful?

9/19/2022

Fall is here

Fall is my favorite season, but this year it seemed that as if instead of going for a gentle change, Summer packed his briefcase at 5 p.m. and left for home, and the morning after Fall came into work, laughed and turned the thermostat down.
Other than in previous years, I'm taking this with a grain of salt. Given the current energy situation, should or can I turn the heat on? Will I have to look for the perfect cardigan yet again (I have very specific requirements and only ever found one that I gave away as a gift, something I still regret to this day)? Will I have to spend fall and winter in bed, covered by Gundel and dem Dekan, and how will I get them to stay there?

I decided to cuddle up in a blanket for now and concentrate on something else - fall colors.
Since der Dekan made his entrance in this house, I haven't got out my loom and only used Delicas for peyote bezels, but now I dug into my stash and made a bead mix from silver lined and transparent AB amber, a bit of silver lined marigold, and two kinds of red to make a pair of fall leaves. Who doesn't love fall leaves?
I made them in brick stitch and then thought about adding some beads from my mookaite stash, but then I remembered - once again - collecting leaves for a school project on a walk in the woods with my grandmother and how some of the leaves were rolled up at the sides. After trying out a few variations, I ended up with these here and topped them with a few dark red firepolished crystals.


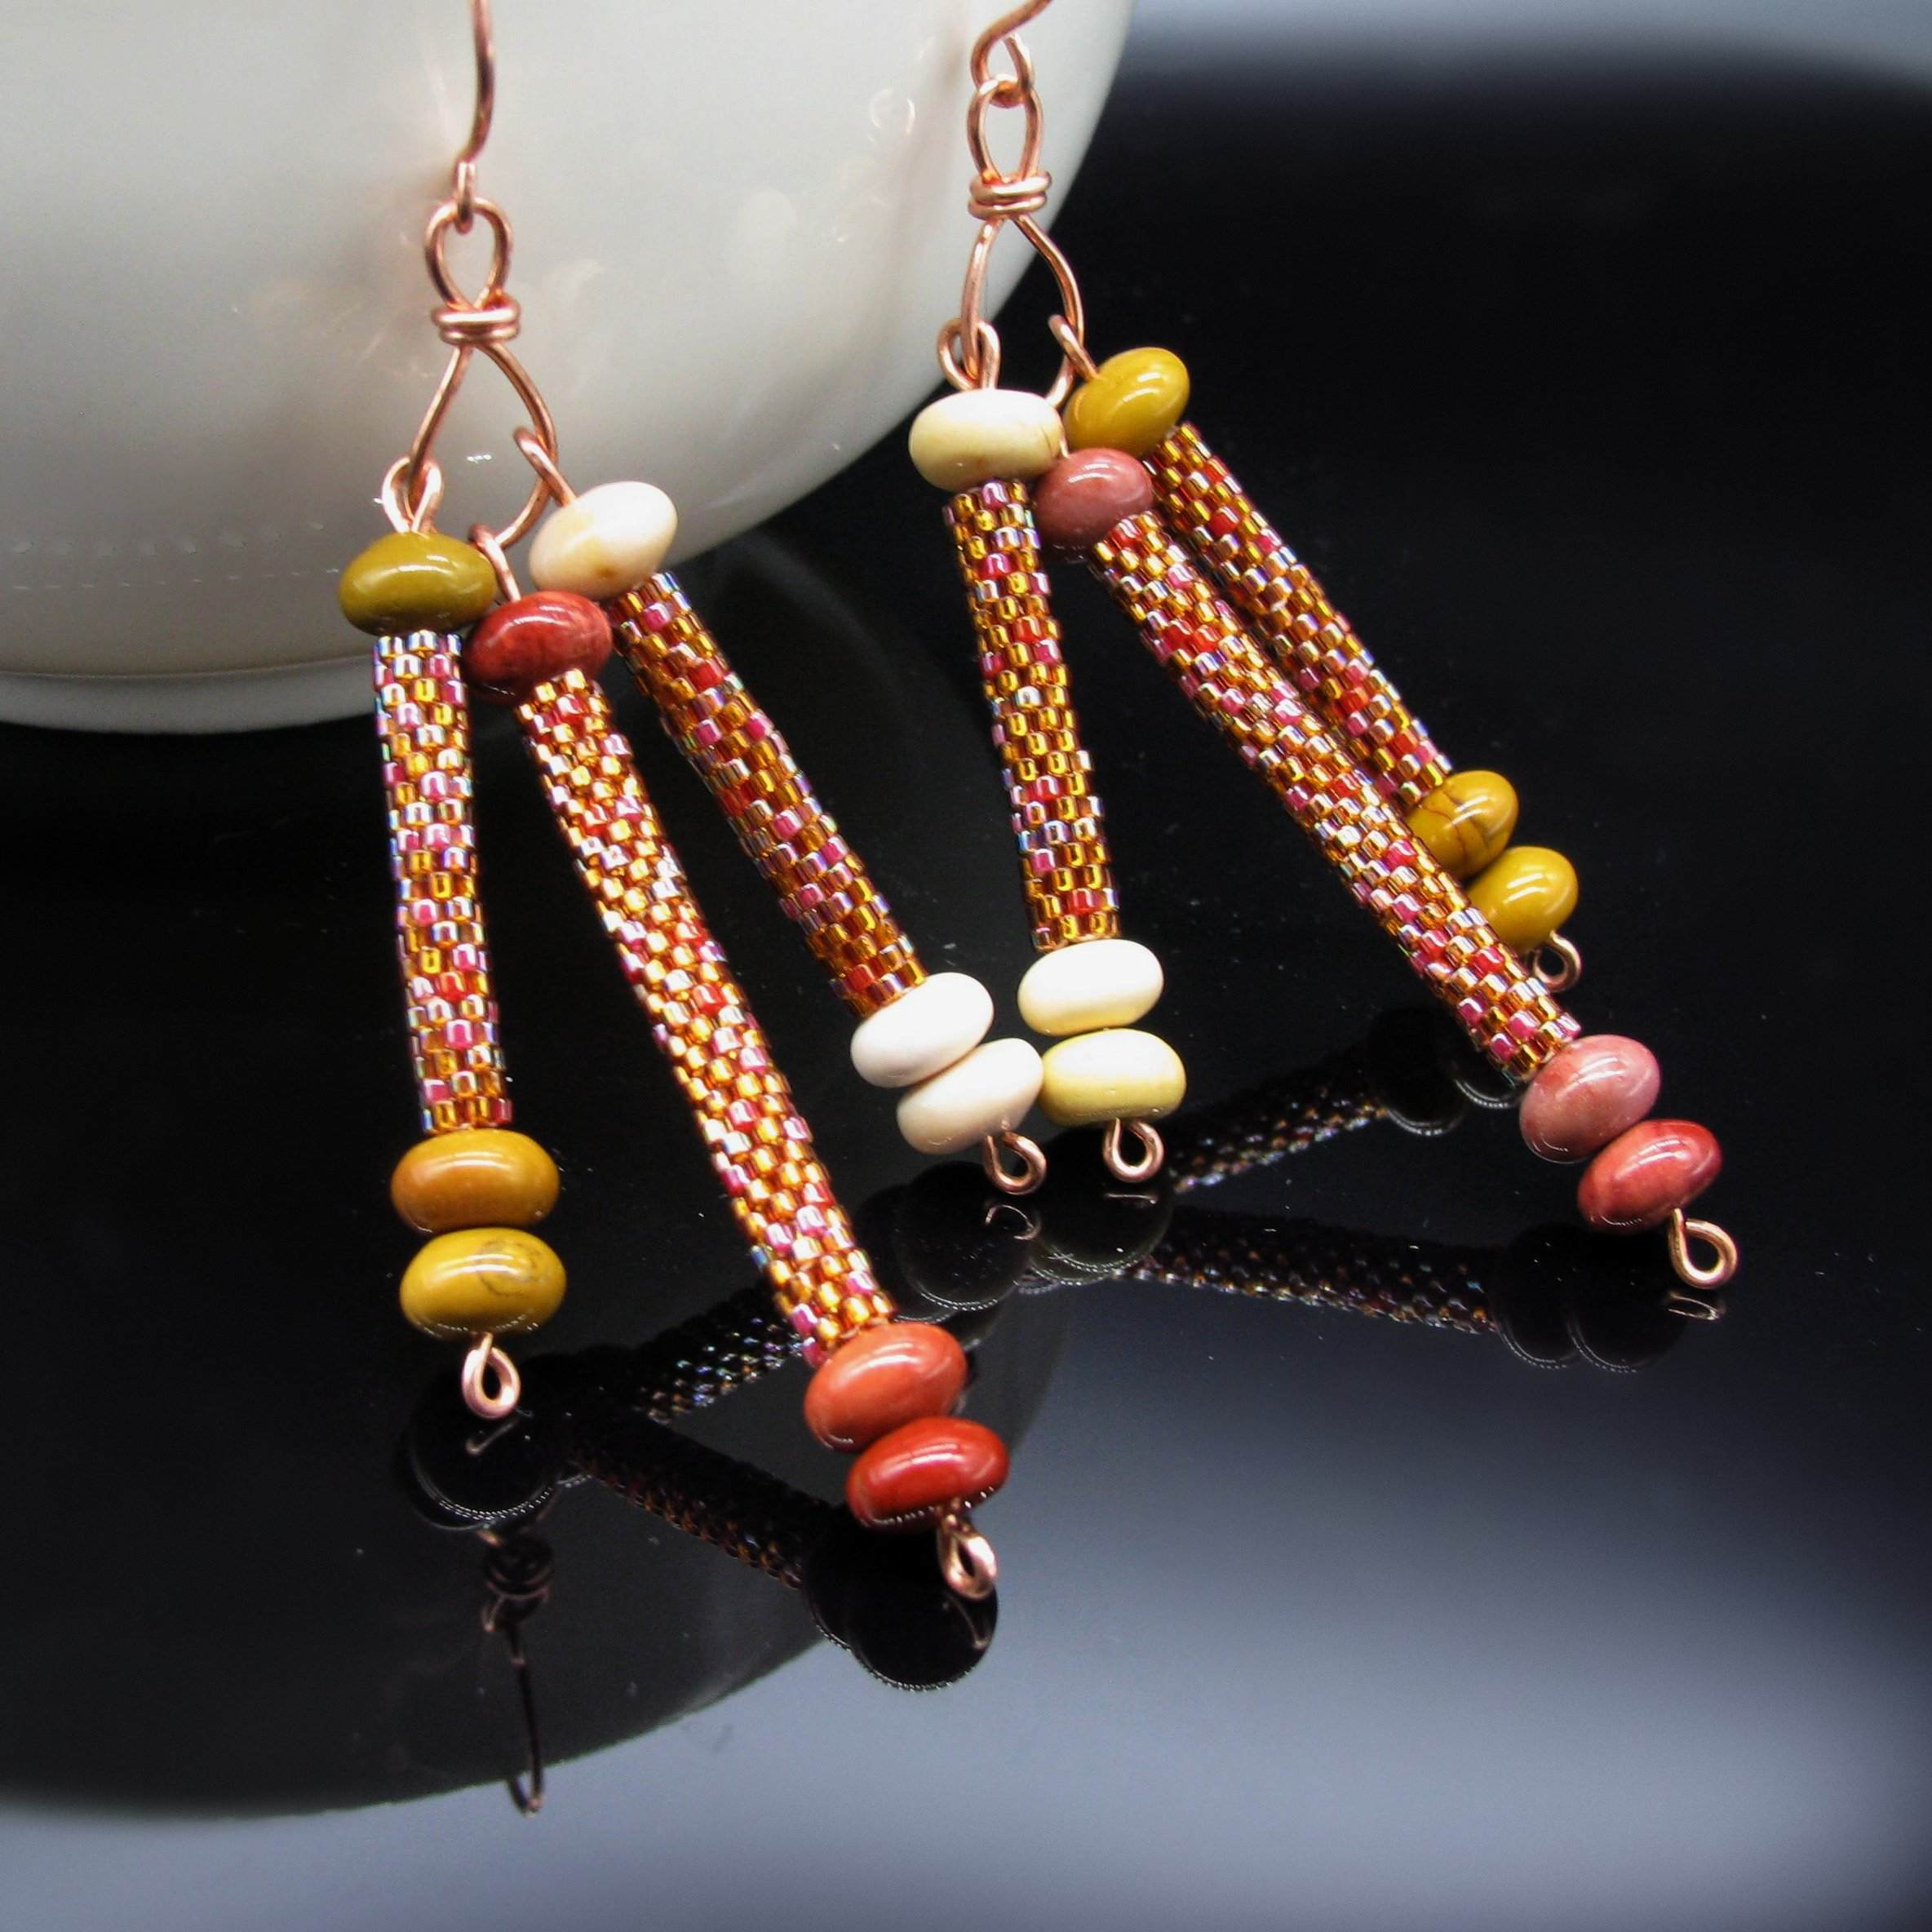
My second pair of fall earrings is from the same bead mix, but this time I was determined to use mookaite which has the perfect colors for it.
At first, I wanted to make just one peyote tube for each earring, but as you can see, there was no stopping me! Copper goes beautifully with this color combination, oxidized or not, so I used copper wires to hold the tubes and beads together and to hang them on my own copper components and earwires.
This pair was really fun to make and I can see it in many other color combinations as well!


A bit of fun for the end. Changing of the seasons always makes me think of "Monty Python and the Holy Grail" ;-)

3/18/2022

Tackle that stash - Peyote tube earrings

When going through the beads for my winged scarab, I found two tubes of Delica beads in my stash drawer. Both of them had been part of a surprise mix order. Whenever I put in a bead order, I can't resist putting one lot of these surprise mixes in my cart.
I may be getting some colors, shapes, or sizes of beads that leave me clueless for the moment, but it's always a nice challenge to use something I would never have thought of ordering, and some of those beads were just spot-on for projects of mine.

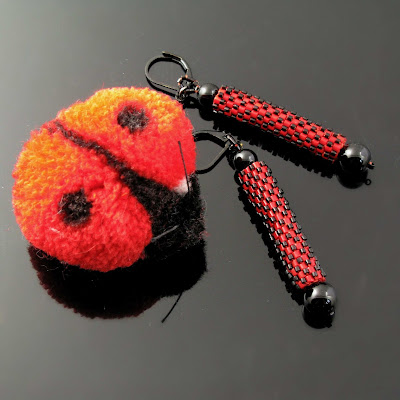
These particular tubes were size 10 and size 8 Delicas. I mostly use my Delicas for bead looming and it could have proved quite difficult to incorporate these bigger ones in an item, so I had to come up with something different and small.
What came to mind first were peyote tube earrings, but of course I would have to add something to the tubes, just plain - even if lustrous - white with a gold lining or red wouldn't be much fun.

So after making the tubes, I went through my stash one more time.
I love these tiny golden AB cubes, so much that I when I first discovered the tiny cubes, I got a whole bunch of them which I still haven't used up completely.
Their edges nestle up to the spaces between the Delicas perfectly.
Just two Swarovski crystals and some tiny seed beads and voilà, a beautiful pair of earrings!


As the red Delicas were smaller, they also needed smaller accents, but what?
That's when my eye fell on my little Steiff ladybug wool miniature (the yellow shine is from my daylight lamp, by the way, for real she is completely red). Perfect!
How do you like my ladybug earrings?

5/29/2021

Miss Francie Bennet - Part 2, The accessories

Welcome back!
In this post I want to talk about the accessories for Miss Francie Bennet - the 60s doll who has been thrown back into Regency times.

As always I had no definite idea which accessories I would make when I started this project.
Of course I knew Francie would need a pompadour, almost all of my dolls get some kind of purse or tote or handbag, except the first two Flappers.
She would also need a hat, that was the part I was afraid of the most because I had no clue how to make a Regency bonnet.
And for going out a shawl would be nice.
That was as far as I planned ahead.

As my big JaLa loom is still occupied by a WIP that I'm not sure about anymore, I decided to use one of my small looms for the shawl. After some quick measuring I figured it would be just big enough for the triangle shape I had in my mind.
It was close, very, very close. In fact I wouldn't have been able to finish the shawl if I hadn't opted for the triangle because I almost ran out of warp space at the bottom.
What I also had not taken into account was that glass beads are heavy and loomed items very slinky. The shawl slid off Francie's arms at the slightest movement, so I had to put in a few stitches to secure it.


Then I suddenly had the idea to give her a parapluie, obviously because I believe in punishing myself.
My test piece was bead embroidered, but the shape reminded me of cocktail umbrellas, so I had the idea to make strips in Herringbone instead, sew them together and, well, wing it from there.
The little parapluie has nine strips which I sewed together on the inside and extra at the ends to emphasize the seams. A little hole which I wanted to use for the shaft remained at the top. So far, so good, but of course this construction wasn't completely firm. I took a deep breath and put glue all over the outside and inside to reinforce it. That sounds easier than it was, of course it got a little messy. Glue and I - the endless story.
In the end, however, I had a nice firm structure, yay!
I added fringe all around and finally the shaft (for which I beaded around a wooden skewer like for the Fairy Queen's staff) with a golden end top and handle. Voilà.
Francie can't hold this parapluie because she can't grip it and she can't bend her arms, so the plan is to either just put it in front of her or maybe add a strap, so it can dangle from her hand.


After this exhausting part of the project I needed to make something small, Francie's pompadour.
There's not much to say about that, you have seen variations of it before.


I had saved the biggest challenge for last - the bonnet.
Two things were clear. It had to be built up from several parts, and to make it sturdy enough, it had to be bead embroidery.
I looked at all kinds of Regency bonnets and explanations. Of course soft crowned ones were out of the question for me as I don't know anything about embroidering on fabric, it had to be the stove pipe kind.

Then I tried to keep everything that I had seen in mind and cut and bead embroidered three of the parts, sewed them together and glued on the Ultrasuede afterwards. This is a very short description for what took me a few days with the sewing and glueing being most difficult.
I also added some wire to the front part which helps to shape it, well hidden under the Ultrasuede.

The fourth part was even harder to deal with because I had to embroider it first and then glue it to the "stove pipe" as it would have been impossible to do that from the inside. There was no way to hold the glued edges together, it would have needed tons of pins to keep the shape. So I had to manage with my fingers and finally it stuck on the way it was supposed to. After it had dried, I added some pink lace on the back which also served to support the glued edges.

The last task was to sew on two rows of lace at the front, a ribbon around the stove pipe piece - again, as an embellishment and to secure the glued parts - and the ribbons to tie under the chin if wanted.
That too sounds a lot easier than it was. I tried several variations for the lace and the ribbons until I was happy.
Now I may have to make a little hat pin to make sure the bonnet will always sit well.

All in all it took me about three days to make the bonnet and I don't see myself making another one very soon! ;-)


And now here's Francie in all her beaded glory.
It was a fun project, a frustrating project at times, it took patience, fantasy and, I'll be honest, some cursing, too.
There were moments when I thought I wouldn't be able to finish it, but now I'm very happy that I pulled it through!


Francie is a registered trademark of Mattel, Inc. I am not affiliated with Mattel in any way.