Showing posts with label rope. Show all posts

1/27/2026

Sometimes you have to make a cut

The labradorite stones that I had or have are usually blue, grey and green, but labradorite can have so many more colors with the rarest being purple.
Months ago, I went through my cab drawer and noticed that one of my carved cabs which looked grey and green actually had a beautiful pinkish shimmer in a certain angle of light. That I haven't been able to catch well (yet?) in my pictures, but it's there, really.
And I knew just the beads to use with that.

For the bezel I chose my beloved "magic apple" coated seed beads. It will be a very sad day when they are all gone, I even love just looking at them in the tube. For the connection with the pinkish hue I chose a transparent dark red - another favorite of mine - and some pinkish 15s.


The bezel is the easy part. It's not so easy to decide what should come next, and this time I made the wrong decision.
I was looking forward to doing another freeform focal. I love freeform (and sometimes wonder how much Gary Larson's amoebas - google them if you don't know them - are to blame for that because I always think of them when I do it). I wanted to make it a mix of reds and pinks in different bead sizes, maybe with a touch of gold here and there.
When I do freeform, I like to cut the felt around the cab into shape first and then follow that with the beads. Usually I'm quite happy with that although I may have to trim the edges a bit here and there. In this case, though ... oh my, I hated it after the first three rows, I think, but kept going anyhow.
It's hard to explain my feelings when I continue working on something like that. It's like a drop of hope swimming in a sea of doubt,- there's still a tiny chance I'll manage thanks to a creative miracle - or more often a molecule of hope in a sea of anger (at myself), loss of motivation, and the voice of my muse yelling at me to give it up already.

That's the hard part. Sometimes you need to push on, sometimes you need to make smaller or bigger changes if possible - and sometimes you just have to cut.
The way I had cut the felt meant I wouldn't be able to use it for a regular design, but I liked the bezel and didn't want to do it over. Why should I, though? I just cut along the edges of the bezel and glued it all to a second piece of felt. Duh. Not that difficult, is it? So the cab sat higher than usual now because I like using thicker felt, but that was fine with me.

To hide the extra edge, I used beautiful large dark red/purple beads, then a row of gold for contrast and two rows of edging in a raspberry and the magic apple.


After that I was stuck. I have always had that problem with the drop shape, from the very first labradorite drop I ever used (remember I asked your opinion the other day - well, no answer, so I had to deal with it myself).
Do I want the tip up or do I follow my muse who always wants the tip down? As you can see, Mabel has won.
I added a large beaded peyote tube in the back for the twisted Herringbone rope I had woven in magic apple and dark red/purple. It makes the pendant sit at a slight angle instead of flat.

And if that wasn't enough, I had to give in to my asymmetric side. It had taken so long to develop, but it's here to stay now.
My first plan had been little brown glass flowers which I had used before and love a lot, but alas, I couldn't find them quickly.


I did find these leftover pearls, though, and liked the contrast they add to the pendant. Bold, maybe, but I felt the necklace could use some boldness to make it a bit less classic (and boring).

I cheated a little, by the way. At the moment that I'm writing this, the necklace doesn't have a clasp yet. I don't have a golden lobster clasp that is big enough, but I didn't want to wait taking pictures because I'm so happy this WIP that has been waiting in the workbox for a few months now is almost finished!

3/18/2023

Clumsy Saturday

It's one of those days. Actually, it has been one of those weeks. If this keeps going, I'll probably get eaten by my cats tomorrow.

That's why I can only share two pairs of earrings that I made this weekend. The third pair is unfinished yet because I cut my index finger like an idiot, and now I have to move my hand at an awkward angle if I try to bead which makes my wrist hurt which then makes my elbow hurt - long story cut short, I gave up for now.
It has been fun digging through my bead stash, I hadn't done that for a while. I think there will be more variations of these earrings once my finger is up to it again!


10/23/2022

On top of the hill

Agate Hill is in the middle of nowhere, so nowhere that no one even really knows where that is.
It's not a big hill and there's not much to see, just some stones and a few trees over which the moon and stars shine in the night sky. Of course there also the three houses.
No one knows who is living in the three houses, either. No one noticed how they got built and who built them. They were suddenly there with their icy looking walls and bright red roofs. Sometimes you can hear sounds that make you wonder what's going on there. Gnome workshops? Some of Santa's elves exploring new territory?
Not one has been brave enough yet to knock and say hello ... would you?


Actually that's pretty much how it happened.
The houses were suddenly there. Everything was suddenly there. All I had done was glue the agate "hill" to the backing and bead a bezel for it. The rest was magic. Or my muse. My magic muse?

Every, now and then I wonder if it's a good thing to work like that or if I should challenge myself to plan something, with sketches or a list of what colors I want to use, for example.
On the other hand, those are the pieces that are the most fun to make. Sometimes I'm sorry if I have limited myself by using a piece of backing that isn't big enough for the thoughts in my head. Then again, however, it can be really exciting to take on the challenge if the right idea suddenly pops into your mind.

When the focal was finished (with black faux leather on the back, by the way), I went through my beads for inspiration. The dagger beads had just the right color and luckily I had just ordered the blue crystals that I used in the rope.

Now I only need to find out who lives in those houses.

3/15/2022

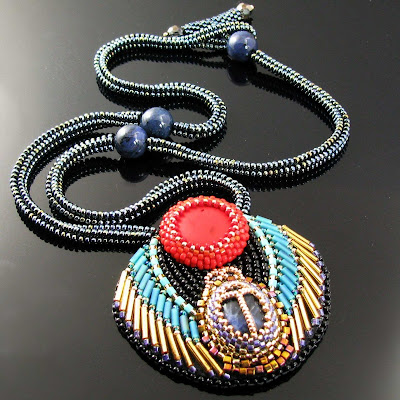
The winged scarab

Khepri was the god of the morning sun in ancient Egypt. He was believed to push the new-born sun across the sky in the shape of a scarab the way real scarab beetles roll balls of dung from which their young emerge.
Khepri was depicted either as a god with a human figure and a scarab face or simply the scarab itself.
This is of course only the short version of his story.

When I put a little sodalite cabochon on my backing, nothing could have been more far from my mind than Khepri. It had been supposed to be a little in between project, a small cab on a small piece of leftover backing, with a bezel and maybe some edging for a pendant or part of a ring.
My plans changed rather quickly, though, when I had chosen a combination of blue and gold for the bezel and added tiny golden beads which turned the humble sodalite in a kind of scarab.

It was then when I remembered the winged scarab and went to look for some beads that would work for the wings.
I don't often use bugles, but have some choice in different colors from ordering surprise or destash lots.
After exchanging the backing because my piece was much to small for the new idea, I had to decide how to shape the wings and if I wanted to add the morning sun. Just in time I remembered having red magnesite around which would work perfectly for the sun.
When I had finished scarab and sun,
I chose colors for the wings that reminded me of ancient Egypt, turquoise - shiny and matte with an AB finish - gold and purple.

The result was not at all what I had expected when randomly picking the sodalite from my stash.
Next - pendant or necklace? A bail seemed wrong, so it had to be a necklace, and if you have seen my last necklaces, you will have noticed that I love Herringbone ropes for my focal pieces. In this case, I added some dumortierite beads - for lack of lapislazuli.
I'm really happy with how this piece has turned out in the end!

2/28/2022

Ready for spring

The last time I had expressed the hope that I would be ready to show something new soon, based on one of the designs I had shared.
For this I used some beads that I have probably had around almost from the start of my jewelry making. It was at a Sunday market in a small town nearby where I found a strand of blue goldstone. Back then, I had only seen red goldstone before, and I really loved that deep blue. If only I had known that these beads would haunt me for years, I am almost sure that these haven't been the last ones because they have been hiding in old pieces that I set aside for ripping up before.
My problem was that I never had a really good idea for them.
I finally found a good use for them, though, even if it meant that I was shamelessly hiding that beautiful blue in the process.

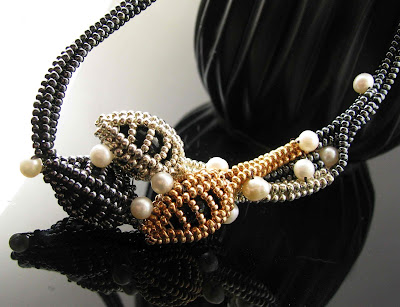
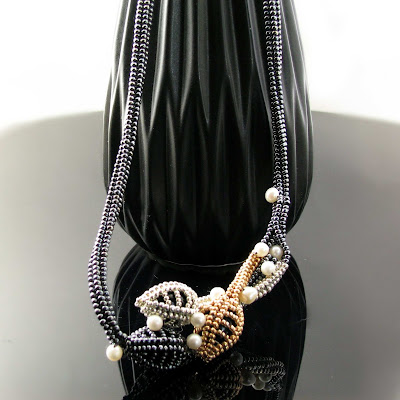
They are perfect to incorporate them in these beaded buds, and as I had three of them, I decided against another pair of earrings and instead made this necklace
With the necklace, I'm also once again embracing my asymmetric side which doesn't happen that often, both with the position of the buds and with the different colors.
Originally, the third bud was supposed to be bronze colored, but I didn't have the necessary size 15 seed beads for that, and I simply couldn't wait for an order because I was afraid the necklace would end up in the infamous WIP drawer.
Now I'm thinking the gunmetal makes for a very nice contrast, too. What do you think?


6/03/2020

Dainty

The moonstone in this pendant has been an old companion of mine. In fact it has been around almost from the very start of my jewelry making journey. There were originally two of them that I had made into wire crochet pendants - not easy with a cab that size - one sold, the other one got ripped eventually.

I love moonstones because I love the moon. I really think they deserve their name.
As small as this one is, it still has a lovely blue glow which made me choose some silver lined light blue seed beads with the clear beads and crystals. I mostly used a thread also in light blue to give the clear beads a touch of color as well, only the picot edging sitting on top of the crystal row is made with white thread. 


Including the bail the whole bead embroidered pendant is only an inch, so it needed a dainty chain as well. When I went on YouTube to look for something else, one of my recommendations was a two bead spiral Herringbone rope tutorial.
I wish the internet would get out of my head!
Nevertheless that was one recommendation that really worked for me - I still don't understand why YouTube seems to think I'm into crazy disclosure stories about English Royals just because I watch one channel about Victorian cooking! - because the dainty look was perfect for my pendant.
Also it's not hard at all to do, and with everything that has been and still is going on, both personal and in the world, and which occupies my mind, it felt good to get lost in a repetitive process for a while.
To enhance the icy look, I chose clear and silver lined clear seed beads for the rope and finished it off with a simple click clasp.


At the Jewelry Artisans Community we have some tiny challenges - tiny because not many people participate - six times a year, the latest one was to make a piece of jewelry with your own chain.
I have often made wire ropes to go along with my pendants, mostly crocheted or knitted, but I never make chains from wire links on my own. My plan was to tackle one of those, but I didn't feel I had the nerve for it at this time.
So it'll have to be this instead.

7/30/2019

Art Elements Design Challenge and Blog Hop - Flowers

It has been a few months since I last participated in the Art Elements Design Challenge. While my muse is still on an extended vacation at a place unknown to me, I responded to this month's topic right away.
Flowers, that's easy enough even for me, I thought. The bonus was that I had already planned a flower piece for the Jewelry Artisans Community challenge! Now I had just to pull it through of which I wasn't sure yet.
Stick with me for my story, will you?

Shortly before my birthday in June my pal gave me a wonderful gift. We would go to see Jane Goodall, one of my heroines since childhood, in Munich.
On the way back home the next day we didn't take the direct route, but went along the little towns and villages (where we discovered for example that there's something called soccer golf, but that is not part of this story). Summertime, flowers in the fields, a/c in the car to protect us from the heat outside ;-) it was very relaxed. At one point I wanted to get out of the car and take a picture, though.
This was the field with the most poppies along the way and it brought back memories big time. As a kid and teenager I had a friend with a dachshund. Near the house where we would take Finni for a walk there was a big field with poppies and cornflowers. It was beautiful, and I don't know why, but on my friend's birthday - we've lost touch since - this field is always what I think of first. I guess it's one of those romanticized childhood memories of lighthearted fun.
So we got out and I took a picture of the field on the other side of the road and one of the single poppy on our side of the road. Probably ran away from home to see the world, that one.


Can't you just see Dorothy and her three companions falling asleep in the field of poppies that the Wicked Witch prepared to keep them from making it to Oz?


On with the story. These pictures became the inspiration for my flower/summer piece.
I had a plan. I would do something that I had only done successfully once before. I would bead crochet a rope with a pattern of stylized poppies. That sounds easy enough again, doesn't it?
It wasn't. You have to know that I had tried bead crocheting several times before and I didn't get the hang of it, so I always stopped after a few rows. I hadn't even bothered making a pattern then. Finally I tried it again when I ripped up a piece I had made with size 8 seed beads, a good size for practicing.

Now I was determined. I went to my neglected bead crochet program, ready to go - and it didn't work. I couldn't even download it again, but I wouldn't let such small things get in my way, naaaah, not this time! I downloaded the old version and made a very simple poppy pattern using the colors of size 11 seed beads that I had in my stash.
I didn't have any yarn except what was left over from my bead knitting course, yellow or white. Obviously yellow was not the right choice. A lighter blue would have been better than the white, but it would work.

The pattern was not simple enough for me, it seemed. It's amazing how often you can count wrong while stringing beads or get confused in the middle of an easy bead sequence, so you for example repeat something that shouldn't have been repeated.
There was one moment when I was very ready to throw that beaded yarn against the wall. Once again there was cursing, but in the end I had done it. It was the first miracle.

So I started crocheting and while the tension in some spots is less than perfect - after all I was only used to crocheting with wire - I managed to finish the rope. That was the second miracle.

Next stop, glue trauma. There is no way to explain how much I hate glue and glue hates me. In this case you can tell by the clasp. My glue hadn't been used for a while and I first had to dig out some gunk to get the glue to flow right at all. Which it then did in a most generous and unplanned way.
You would have been so proud of me. I cursed just a little and did my best to clean up the clasp (and my shirt, thank you very much). There's still some on the beads next to the clasp, but this piece obviously isn't for sale anyway, so I took a deep breath and kept going.
Next I filed down the clasp. I had only got a gold tone clasp in the right size, and I'm not really into gold and even less into shiny gold, so I wanted it to have at least a matte finish.

Originally I had planned to add something to the rope, a 3D effect, a beaded poppy maybe, not necessarily a big one, just as a little extra. After I had mde three attempts at beaded poppies, I gave up. I just didn't like the look, and even though this is a simple rope now, it had been quite the achievement for me to finish it at all.
So here you go - a very long story and a very simple result.


I could have made more flowers. I have bead loomed flower patterns, I have crocheted and knitted flowers with wire. I had made them from polymer clay. My only tutorial ever is a small flower.
This simple rope necklace, however, had deserved to be the star this time.

Not only a design challenge, but also a blog hop - please have a look at what the other participants have to show you. It will be like walking through a beautiful garden! :-)

Guests

Alysen - Cat (that's me ;-)) - Divya - Evie and Beth - Hope - Jill - Kathy - Linda - Martha - Melissa - Michelle - Rozantia - Sarah - Sarajo - Tammy

AE team members

Caroline - Cathy - Claire - Jenny - Laney - Lesley - Marsha - Susan

7/20/2018

Tackle that stash - The mysterious stone

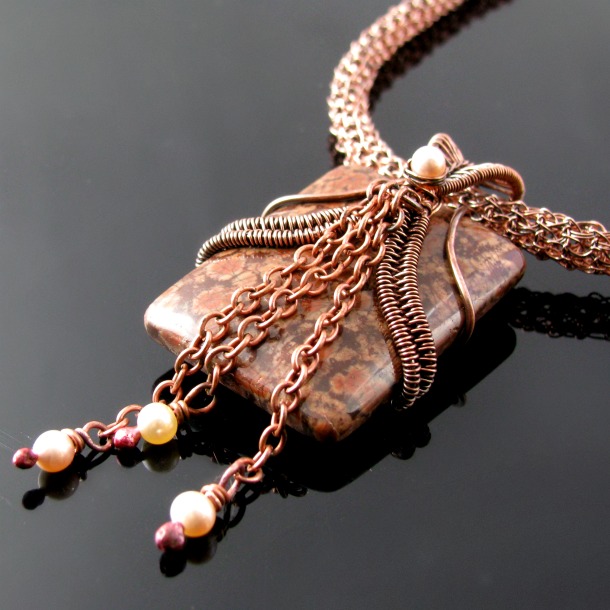
I was decluttering drawers when I found the stone. Jasper maybe? Fossilized coral? I have no idea, just like I have no idea where that stone came from in the first place. It was in a little tin box with bits and pieces of costume jewelry that I recognized, but the stone didn't look familiar to me at all.
Had it been a gift? I very rarely get drilled stones, and the ones I have usually were a gift to me. Or did I buy it myself? If yes, it must have been way before my jewelry making days because all the other pieces were so old, I got an 80s flashback. Maybe I bought it as a gift for someone?

Whatever the story is, the stone was pretty and asked for some wire weaving. So I wove ... and took it off ... tried another idea ... and ripped it apart ... the first time was not symmetrical enough for my taste, the second time I kind of liked the idea, but started it wrong and then decided I'd have to work on that idea a little longer.

Third time worked like a charm, though. Less weaving not to hide too much of the stone, a bigger bail with a pearl for accent, and three pearl dangles for movement.
A simple chain seemed to be not enough, so I crocheted a rope for the pendant and then oxidized all the copper.

And now I am happy with it. Maybe I'll have to declutter more drawers, so I can find more treasure ;-)


9/23/2016

Tackle that stash - Water and sand

What kind of person wouldn't like a surprise parcel? And even better if you are a jewelry artisan, a surprise parcel with ... you guessed it, beads in it? An eclectic mix of beads. As I put it elsewhere "skulls and flowers, snails and leaves ... what sounds like the ingredients for an interesting potion is in fact a parcel ..."

One project that I started for myself from some of those beads to see if the design would work out the way I wanted it to still needs its clasp and confronted me with an interesting problem, but that's not today's story.
The last Oldies but Goodies Challenge is over, but seems to have inspired me.
Doesn't this say seaside?

Instead of silver wire that I would usually have used with the light blue/greenish stone chips I chose a warm copper wire, hence the title of this post as the blue stands for the water and the copper for the sand.
Together I crocheted them into a rope.
That didn't use up any stash, however, because the parcel only arrived a short while ago and the strand of chips had not even made it from my desk to the infamous drawer.
Not that I am obsessed with having to use stash no matter how, but in this case I felt one of my shells would actually make a perfect focal part for the necklace. I picked one that goes beautifully with the copper wire and knitted a setting for it that I attached to the rope.
One simple white pearl is the only embellishment.
VoilĂ !

1/22/2016

Tackle that stash - The Manatee

Did you hear that it has been proposed to take manatees off the US endangered species list?
The first thought is of course "oh good, that means that they are doing better, right" and then you start thinking about what exactly it might mean. Will they be less protected? What does "endangered" mean anyhow? What is the next level if they are downgraded? It's "threatened". Oh, doesn't sound THAT much better, does it? Here's an article if you want to know more.

Now you may wonder what that has to do with my stash and why I break my rule to keep this a crafty blog, even if just for a small introduction?
First came a stash of bigger, irregular seed beads in ocean colors. Dark blue with a hint of AB luster, a transparent sky blue and a silver-lined light blue. I couldn't have found any other design for to use them, so I crocheted a long rope from wire.
Then I came upon the news about the manatee and remembered the beautiful lampwork pendant by Tom Heath from Sanctuary Glass Designs that I still had in one of my treasure boxes. Actually it's more than beautiful. It's clear glass over a base that gives you the feeling as if you are looking into water with light playing on it.


Now I'll have to think of some way to use Tom's shark pendant that has also been waiting in the box for too long ...

5/08/2015

Tackle that stash - Wire knit rope necklace with Boswana agate and lampwork

I have had these Botswana agate chips around for a while, they were a gift. Up till now I didn't have an idea for them. They were not regular in size and shape, just like chips are, and they were not drilled, either.
The only thing left was to cage them in wire which is what I did with one of my rope necklaces. It's a long necklace without a clasp. As the agate was mostly pink and grey, I picked the rose gold wire for knitting the rope.

I still have my problems with asymmetry, but we did talk about comfort zones lately as you might remember, so I did go for it. Some of the chips were randomly caught in the rope along the length, but I also added two "bubbles" full of agate and one with two grey lampwork bubble beads in it.
It's funny, when I learned chain stitch in elementary school for the very first time, we had to make a shopping bag. I picked pink and grey, since then these are two colors that belong together for me (they will turn up in a future project as well, by the way).

And here it is now, this week's stash tackler.

7/20/2013

Raspberry and honey

I'm not the cooking type, just in case you expected a fantastic new recipe for dessert now, sorry.
It does sound good, doesn't it?
I'm talking about colors, however. Let me show you one of my latest pieces and tell you how it "happened".

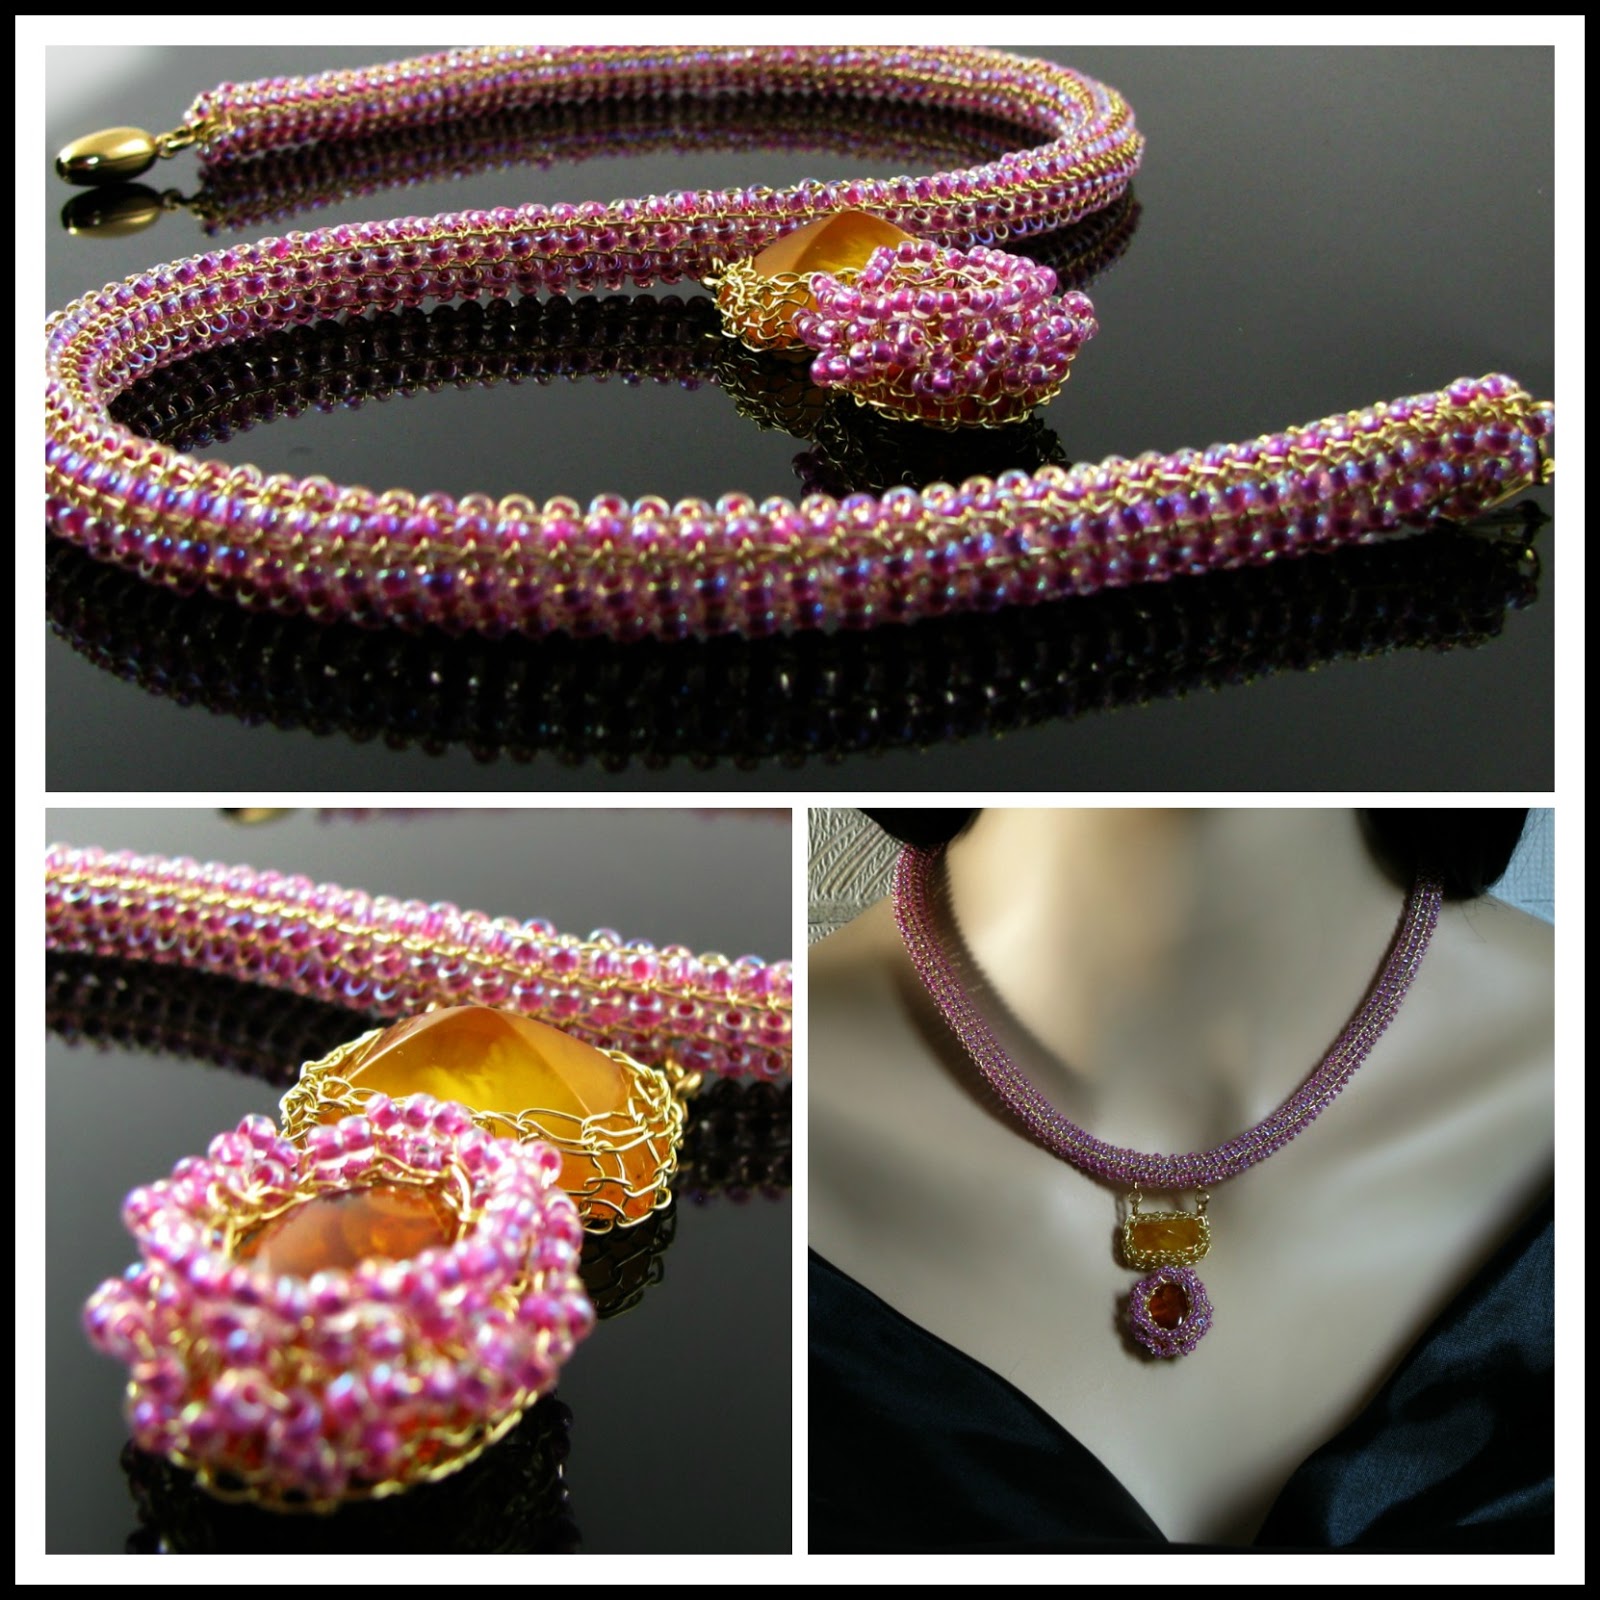
I love color lined crystal seed beads, and one color that has grown very dear to my heart is raspberry. To make these beads even more fun, they also have an AB finish. Seriously, they look good enough to eat. Without knowing my crush on them a friend gave me a tube for my birthday, in a bigger size than I use for looming, so instead I began to knit a rope, with a crochet hook as always of course.

When I had finished the rope I felt that something was missing, something to compliment the light golden wire that seems to make fine stripes in the rope. I asked myself what beads or cabs I had that would go well with it and came up with my faux amber cabs.
I knew I had one that was very light in color, reminding me of that creamy Canadian honey that was a special treat when I was a child. The pyramid shape made it even more interesting. I tried it this way and that way and decided that alone it was not big enough for this rope, so I picked out another cab in a dark honey color for contrast.
While the light one got a simple bezel that wouldn't distract from its shape, I picked up the raspberry color in the bezel for the dark cab again by adding two rows of smaller beads which gives it a slightly flowery look.

It's available in my Zibbet shop now.


3/08/2013

Here a bit and there a bit ...

It all started quite simple. I had had this agate slice around for a while and decided to finally make it into a piece of jewelry. A pendant to put on a chain or a rope.
Sounds easy, doesn't it? Well, let me take you through the single steps to show you how pieces of mine develop.

1. What technique to use for the pendant?
There are three choices - wire crochet, wire knit or needle lace.
With a stone like this which is kind of slim and long, also pointed at the top, wire knit is a good choice since it makes a bezel which is nice and flexible to shape around the stone. Since wire knit has such an open structure and not much of a wire pattern in itself however, I felt it needed a little extra for contrast.

2. Welcome the little extra.
In come the seed beads. The agate slice has a subtle grey and blue pattern turning brownish at the top. Hm. Grey or blue-grey beads? That would a bit boring, would it? How about a bolder color? Brown, shiny brown ... ah, silver lined topaz.

3. Have a look at the wire stash.
My so-called "smoke" color is still tied to my disk WIP. Silver? Gold? Maybe a bit more subdued and let the seed beads do the work. Didn't I still have that pewter colored wire somewhere which feels springier than my usual wires and that I have been wanting to try out for months? Ah, there it is.

4. Knit a bezel for the agate slice.


5. I had showed a picture of the finished pendant and asked people if they thought that I should add a rope and the unanimous answer was I should.
Rope with or without beads? I finally decided on gold lined crystal seed beads as I found that more of the topaz beads would be overkill.
So I put loads of seed beads on the wire and starting knitting, with a bead after each stitch, until I had a nice length.

6. That was the point when Mabel, my (virtual) muse, started chiming in again. "A simple beaded rope with a pendant? Are you sure? Come on, you know you want to keep playing a bit. Yeah, twist that rope. Just one twist? Really? Try another one. Fix it with a headpin, so it won't open up again. Another one, don't you think?" "Mabel, I will have to add something, like this it's too short to go around a neck." "Well, add some chain. And how about making it real long. The pendant is large enough to look better if it dangles way down. You could even make one more twist. Don't be shy, try something different."


7. I usually listen to Mabel, and if she thinks I should be a bit more crazy from time to time, she's probably right. Try something different every, now and then.
So I added chain and a large leaf and branch toggle clasp.

And here's the result, now available in my shop.


11/29/2012

Wire knit or wire crochet?

Two of the favorite techniques I use in my work are wire knit and wire crochet. People often ask me why I have different names for them because they know that I use a crochet hook for both techniques. There's an old post here where I started to explain the difference, but then I thought it might be interesting for you to if I dig a little deeper.

First of all let me say that there's no official term 
that everyone uses. What I call wire knit, might be called wire crochet by others, or invisible spool knitting.
I took some pictures of basic samples for you to hopefully clear the confusion up a bit.
Even though it might be hard to believe ... ALL of these samples started out with eight chain stitches and ALL of them were worked on with the same size crochet hook – and the same fingers.
So what exactly is it that makes them look so differently from each other?


Let's start with the flat piece. The first difference 
you might notice is what I like to call "open stitches". They make a piece much easier to unravel, that can be a good thing ... and it can be very bad if a cat tries to run off with your wire (which is not something I ever encourage).

As you can see, the wire knit sample has all open 
stitches while the wire crochet only has one open stitch at the end. Again, open stitches can be good if you found a mistake you want to fix, but more often it is not something you want. This goes for
all shapes of wire knit or crochet, you will see that in the next pictures. Of course it is nothing to get to see in a finished piece, so that fact interesting but no help in identifying a technique.

The other thing you can see is that the wire knit sample has a much more open, airy structure.
Compared to it the other sample is tighter and a bit smaller, too.
Why is that?
In wire knit, you put your hook through a stitch, grab the wire, and make a loop. That's it.
You move on to the next stitch, grab the wire, make a loop, to the next, and so on.
In wire crochet, however, you put your hook through the stitch with the previously made stitch still on your hook and grab the wire. Now you have two loops and you grab the wire once more with your hook and pull it through both of them.
So there is more wire in crochet pieces which makes them less slinky and delicate looking than knit pieces.
They also can't be pulled as easily as knit pieces which again can be both an advantage and a disadvantage. On the other hand, it makes them sturdier and the stitch pattern is perhaps more interesting.


Next I will show you two rope or tube samples.

Wire ropes offer endless possibilities and I love to play around with them to make new designs.
Again, you can see how much more open the wire knit sample looks. I deliberately took the pictures on a reflective surface to point that out even more. It makes this technique perfect for filling beads into the rope. The beads are not hidden as much as in a crochet rop where we know more wire is involved. Also the beads help to maintain the shape of the knit rope because they don't just look delicate, they really are.
A crochet rope withstands pressure from outside a lot better. I wouldn't recommend wire knit ropes around children, for example, or you might end up with a flattened rope, which isn't that easy to re-shape if possible at all, or you suddenly have a slimmer but much longer necklace which something that can't be changed back at all.

Last but not least I'll share the disk with you which is often the base for making bezels for rocks, beads, or cabochons.
Thanks to being so flexible, a wire knit disk can be shaped beautifully around a stone, even the free form ones. I have also used it for rings, earrings, and pendants, with or without beads.
The crochet disk is sturdier and therefore harder to use on irregularly shaped stones, but it works great for rounds or ovals. I have also used it as a focal base for necklaces or earrings.


Of course I know I have only scratched the surface with this, but I hope it helps a bit for the start.

4/29/2011

Vacation update

Well, yeah ... I knew it wouldn't work out. I still haven't written the e-mails, two of the challenge pieces are not finished yet, but to my defense I have to say that I wasn't home longer than a day.
I went to a, let's say, sort of private movie festival. Who knows maybe one or the other quote will turn up eventually.
That doesn't mean I haven't gotten anything done.
Let's see.
- one challenge item done, one almost done, the last one prepared (not sure if that one will work out), laundry done and chest cleaned out
- feet put up thoroughly, DVDs watched in abundance
- social media and e-mails ... ehm ... *cough cough* you get it
- grocery shopping done, but not by me, pile of books reduced a little bit
- playing with cats done, photos not really
- clay is still on my list, but calls to friends and family are done
- visit family ... done
- I didn't really believe I'd write a letter by hand. That's good because I didn't do it
- online gaming ... nope ... nap one, today
- relaxation ... oh yes, it was a very relaxing week. Can I have another one now?

And I dreamed, not about my to-do list, but about someone who shall stay unnamed pushing Ponder around in a shopping cart at work. I do dream weird.
If you want to see proof of something I have done, here it is - yes, I'm still obsessed with Deronda's gorgeous lampwork beads.
This necklace makes me think of a painting of spring in the countryside.
It's in my ArtFire studio now.


6/05/2010

The Rainbow Fairies


The idea was born when I started sorting a small plastic bag of bead soup. I can't call myself a seed beader although I have used beads more than once, and little did I know when I decided to separate the bead soup into his ingredients. I didn't do it all in one day, it took a few days, but finally I had all those neat little plastic bags with one bead color each.
So now what?
I held the bags next to each other, thinking about possible color combinations and the next thing I knew was me throwing together seed beads. I guess I should have thought about that earlier, it would have saved me some time.
The first necklace was the blue and green of the ocean and there it was, the crazy idea of making many in different color combinations - the necklaces for the Rainbow Fairies.

The Rainbow Fairies have their club in a treehouse on the highest tree you can find. When joining each of them got their own special necklace in their own special colors as you can see in this picture. I'm sure they'll attract new members over the time.


And there are those last leftover seed beads in the bag that didn't match any of the other colors. How about a Fairy of Color? ;-)

They are already listed in my Zibbet shop by the way, but are supposed to move into my other shops as well soon.