Showing posts with label beading. Show all posts

8/24/2026

Kites and cubes - The big ones

A week ago, I posted about using tiny 1.8 mm cube beads for a kite shape and announced this post about using the 3 mm cubes.
These bigger beads and I have a bit of a fraught relationship. When I started out crocheting and then knitting with wire, a friend told me that she had big cube and triangle beads which would be just perfect. They were leftovers from her beading days - that should have been a warning, if she didn't know how to use them, how would I? - and she would make me a good price.
In the end, I gave in and literally regretted it for years. The triangle beads were easier to use, but the cubes - there were loads and they were too heavy to use really many of them in pieces of jewelry ... I can't even tell you how often I tried something and ripped it up again. Finally, I used quite a few in my "pineapple slices" aka Christmas ornaments.
 

One experiment from when I also started bead looming was using them for that. Where the tiny cubes worked quite well, though, the big ones just didn't look and feel right at all.
Eventually I cut up the one bracelet I had made and the big tube of beads went back into the tin with all my tiny cubes where I found it again now.
Years ago I had a regular "tackle that stash" day on my blog to motivate myself to use up really old supplies - maybe it was time to tackle this bead tube ...

So this is how these two pairs of earrings were created (and now there are only about a dozen beads left which I call success).
I'm sure you have seen the earrings which have a beaded triangle on top, sometimes a diamond with four sides of the same length, in one or more colors, sometimes with a pattern, and a fringe.
 
My own "Jaws" design

This is the same idea, only with "cube kites".
For the fringes I dug into my stash of tiny crystals - and promptly threw a bunch of them all over the place 
😂
It's difficult to catch in a picture, but I quite like the contrast of matte and sparkle.
Which version do you like better?


8/17/2026

Kites and cubes - The tiny ones

K was a kite
Which flew out of sight,
Above houses so high,
Quite into the sky.

(From the Nonsense Alphabet
by Edward Lear)


I love tiny cube beads, so when I was able a few years ago to get a surprise assortment at a sale price from one of the bead shops I order from, I jumped right on it.
Then I remembered that as cute as they are, I always struggled a bit what to do with them. I loomed with them (the result is stiffer than with seed or cylinder beads) ...


... I wire knitted with them (so slinky) ...


... I did peyote with them, in the round and folded ...


... and I still had a box full of cube tubes (this wasn't even everything I made).
So when I came upon a quick tutorial for a beaded diamond kite shape, I thought I'd give that a try (this isn't the only tut for it, it was just the first popping up in my recommendation, but it works well) with cubes instead of cylinder beads.
I first made a test piece in Delicas and immediately decided that instead of the original design I wanted to make some variations, ripping up the test piece again.
These are the results so far.

The kite shape made me think of Art Deco patterns and inspired this design. Simple but with a bold color combination.


One theory is that kites have their name from the hovering birds of prey. In German, however, we call the bird "Milan" and the tethered flying object "Drachen" after dragons.
Inspired by the name, I beaded a smaller version of the design and added dragon charms. Readers who have been around for a while know I can't resist a nice dangle and I love these 3D dragons!


I also tried a pair of earrings using just the open V shape in a combination of clear, pearly white, and matte black cubes.
While I liked the color combination, I wasn't completely happy with the overall look and will be playing with that some more.

Delicas as used in the tutorial are very uniform beads, the cubes not so much although I cull the ones that are way too big or crooked. So it was a nice surprise how well it worked after all.

Cubes also stiffen the design a bit which isn't a bad thing for earrings.
These beads come in different sizes, so expect another post with some "big ones" (3 mm instead of 1.8).

5/10/2026

Chain of hearts

The beads have been calling to me quite loudly for a while, but with my thumb being stupid, the big projects on my list were still out, so I thought it needed something simple for them to be satisfied for now.
Simple usually means something familiar that I don't have to think much about - experimenting often means ripping out and several attempts - and which I can easily take a break from without risking it turning into a case for the infamous WIP drawer.

This chain of hearts was a perfect little project for that.
Earrings are not my strong suit because I often don't remember what exactly I did with the first one (experiments!) to repeat it for the second one or I'm just getting bored after the first one.
For these earrings I only made one heart at a time over the last few weeks, quick enough to not get bored or stress out my hand. 


I used pearly white seed beads in the sizes 8, 11, and 15 seed beads.
Originally, I had planned to use tiny ceramic hearts made by my friend for the bottom. I had put them in a safe place specifically for this ... Erm, does anyone know where that safe place is? I found the tiny stars, the owls, the foxes, the blueberries ... I found everything but the hearts. So I decided to try size 15 hearts for the first time and although it was a bit fiddly, I think they turned out very cute.


I have no doubt that the hearts are going to turn up in the next few days now that they are not needed immediately.
As that touch of color from the ceramic hearts was missing now, I added a silver bead embellishment instead.
Do you think I should have added tiny hearts in a completely different color?


3/29/2026

"Die Herren Pudels"

"Die Herren Pudels" is not correct German if you wonder (it ought to be "Pudel"), it's an affectionate nickname for my favorite poodles. You could translate it as "The Misters Poodles" (staying in line with the wrong grammar), but they would probably prefer the translation "The Masters Poodles" because masters they are - Kosimo and Nemo Black Power vom Glashütter Täle.
Their humans have helped me out more than once, and as I had still one of my small bottles standing around, I thought I'd bead a poodle bottle for them as a little thank you.

I looked at poodle drawings and silhouettes online to get a feeling for the outlines and then made my own pattern of Kosel and Nemo looking at one another. So far so good.
As they are white despite their name (more on that later), I wanted a dark background. I hadn't thought it through completely when I chose gunmetal for it, though, which I noticed when I came to their black noses. I was not prepared to rip up rows and rows of beads. In the right light you can see the noses, but they don't look quite as pointy as they would have with a better contrast which actually works quite well. Lucky me.
It didn't work as well for the collars. The heads kind of looked as if they were floating, so I actually had to rip out those few rows again. I went for slimmer collars in a dark red instead.


No fancy fashion poodle haircuts on these two!

On the back I added a few hearts and a few silver beads.


If you have seen my other beaded bottles, you may have noticed a difference between them and this one.
Usually the beading goes all the way up over the shoulder and neck. I start on the pattern to make sure I position it right - some patterns are a full image which means I have background rows at the bottom or they show just a part of something like here where the poodles go all the way to the bottom - then I do the shoulder and neck and after that I finish the bottom which is never fully closed, by the way.
The bottles I have made so far are never meant to hold any liquid but mostly as decoration although I can put needles in them for example or something else that fits through the neck.

In this case, however, I thought it would be a cute little vase for a single blossom or also a few, such as daisies (as a kid, I liked to bring my mom tiny daisy "bouquets"). The poodle humans love plants.
So I stopped beading at the shoulder which means it's like one of those cooling sleeves now, you can just pull the bottle out if you need to clean it. I actually like the idea.


I felt that the beading needed a nice edge now, though.
Pink crystals were the natural choice because Kosel is 1. the sparkle master with his rhinestone on black collar (Nemo has white Swiss crosses on black) and 2. he loves pink. I have a pair of pink slippers standing in the hallway and he has stolen one of them more than once.


There was just one problem. I couldn't do a symmetrical edge because I have a prime number of beads. So instead it became an asymmetrical "crown" which fits the noble lineage of the master😉


Now the promised explanation for the name.
I have often wondered why some animals have such crazy names (cats are an exception, they deserve the most wonderful and craziest names there are), like horses or purebred dogs, and I don't want to miss out on the chance to tell you the names of Kosel's and Nemo's parents (with their humans' permission).
Kosel's father is named Decathlon Alfredo Magdalena, his mother Iska Black Power vom Glashütter Täle.
Nemo's father is Begin to Dream Love me Tender (a beautiful French poodle also called Merlin) and his mother is Kosel's sister Kosima Black Power vom Glashütter Täle.
The lady Kosel and Nemo came from actually used to have black poodles and then fell in love with the dark eyes of white poodles, but didn't want to change the name.

What's next?
Well, I have a plan, a WIP, and the beginning of a small experiment, so I can't even tell you what it will be, but I hope you'll be here when I can!

11/29/2025

The big hug - part 2

If you don't know part 1 of the big hug yet, you can find it here.

We left off at the cliffhanger of my dropping my boro lampwork shark on the kitchen floor. The nose and tail broke off, but I could only find part of the tail.
Then something unexpected happened that I can honestly not explain. At least a week later, I found the other piece of the tail, but have no idea where it suddenly came from because I had searched the whole kitchen floor. My best bet is that it had flown even further and the cats found it and knocked it back into the kitchen.
Anyhow, I suddenly had a bit of hope that maybe, just maybe, I would be able to do something with it. Not what I had planned, not what I really wanted which would make me 100% happy, but something that was still good.

Now how to achieve that?
Obviously I had to glue the shark first. My complicated relationship with glue has long been a running joke among my friends. Much longer than my jewelry-making journey. It's a miracle I don't still have things glued to my fingers from years ago (that's actually a thing for me). I'm terrible with glue and my experience told me that the shark would not be perfect.
Surprise! Not. Of course it wasn't perfect.
So I would have to find a way to hide the scars the best I could. Distracting from them with gold as I had done for my friend's broken dolphin wasn't an option for me because the octopus is copper. Leaving the tail off completely and disguising it - unlike that of my shark the dolphin's tail never turned up again - wasn't an option either because I had the tail and love that long fin.


The tough part about hiding the scars would be that the one through the nose is very close to the eye and that there's a quite massive glass loop on the tail (it is a pendant after all). Had the shark been like a cab, all the way flat on the back, I might have been able to glue it completely onto some backing.
Even before starting I knew I wouldn't be all that happy with the nose part. Oh well.

What exactly should I do, though?
It was obvious that bead embroidery was the only way to go. As I said, this shark is much smaller than the other ones and was even more fragile now (haha). Just wrapping the octopus to it wouldn't make for a very sturdy construction.

So instead I would glue the shark onto the backing where possible, then sew the loop to it and hide it under beads. I would also glue the octopus's head as well as possible (there are wires from the wrapping in the back which lift it up a bit) just to make it hold safely enough while arranging the tentacles around the shark.

Please excuse this bad picture. It's one of my infamous
night time WIP pics and is usually just intended
 for friends. Actually, I had to retrieve it from an old
Facebook message. I hardly ever take real WIP pictures.

This, my friends, sounds a lot easier than it actually is. I first sewed the tentacles on in a few spots. Copper is pliable and can still very stubbornly refuse to do what you want, especially in thick wire wrapped like this, even more so if you go wild with tentacle loops. I would have loved to preserve more of the flow from the WIP pic, but that would have been very wide for a focal for myself.
Of course I would have to sew down the tentacles some more after deciding on bead placement.

So I did all of that and then I had a lot of space for beads. I didn't want to buy new beads at the time. I had a load of seed and cube beads in different sizes and a variety of blue, clear, green, purple, and who has been following my jewelry making for a while knows I can't resist pearls in water scenes.
I started in what I consider (my) classic bead embroidery meaning going in bead rows lying next to each other. Very organized looking, I thought it would make a nice calm background for the hug.
One corner in, I had to admit to myself that I hated it. Because of the thick wire, those tentacles aren't laying flat. So there are not only beads around them, but also quite a few over and  under them. There are also beads under the shark and over the scars (I'm indeed not all that happy with the nose part, but couldn't manage any better without concealing the eye) and under the octopus's head - and getting in these spaces in nice organized rows? Yeah, it didn't work.
I can't tell you how long it took me to embroider that background, one or two beads at a time.

A slightly better WIP picture, still meant for
friends. It doesn't do the sparkle in the
goldstone or the shark justice.

Next up - my old enemy, finishing jewelry.
Two months and still no chain.
Then, however, I remembered my mermaid (this is one big piece of jewelry, but luckily went to a customer who loves it big).


I still had some copper crimps and the faux leather ribbon whose colors worked well with the background.
When I tried it out, though, I didn't like the look of it after all. Somehow the focal seemed to call for a copper chain to go with the octopus.
Rummaging through my supply drawers, however, I only found chain in the wrong size and I really, really didn't want to make my own chain. So I went online shopping instead, but again the chains were either too small or didn't have the right look.
In the end, I found infinity links, which seem to mimic the loops of the tentacles, and used them with jump rings to make a chain. Luckily, I bought just the right amount!


Is this my vision? Heck no, it couldn't be much further from it. I wanted the octopus and the shark all by themselves, maybe with a few beads to hint at the ocean. Had the breaks be in different spots, I might have managed to do it.

Did I save the shark, though? I think so. Another broken piece that didn't go into the trash, but will be shining on. (The urge to get philosophical about broken beauty is big, but I'll spare you!)

10/13/2025

The big hug - Part 1

Over ten years ago, I got several boro lampwork pendants from a very talented artisan, manatees (you can see one of them here), a dolphin (you have seen him before as well), and a shark. The pendants are absolutely gorgeous, but it took months for them to ship which put me off ordering more. That's a real pity because I have not seen any since that come even close to them.
Also the shark broke in transport. I got a replacement, but I was determined to find a way of using the broken one as well (I've done that more than once with components, but of course never sold those).

If you haven't noticed it yet, I don't just love sharks, but also octopuses.
This is a picture of just some of those I made over the years. A tiny one, bigger ones, a really big one. Ah, have you already seen it? Sharks!


I experimented with the broken pendant first. The idea had been to hide the glue marks behind tentacles, but show as much of the shark as possible.
It needed a lot of fiddling, but I managed. The pendant got the official name "The hug" because to me those two were friends rather than enemies.
If you think the second octopus-shark hug was easier to make with the experience gained, you would be wrong. Lampwork is really slippery and the tentacles had to sit just the right way to hold the shark safely. The loop on the back of the tail is the only spot where the octopus is actually wired to the shark itself.


The second pendant sold and the first one went to a friend (of course she knew about the glued spots).
I'll be honest, I quickly regretted not keeping one for myself, simply because it proved impossible to find another shark like these.

After searching for a long time, I finally found one and was so happy! It was much smaller than the other ones, but so beautiful.
Somehow I never got around to making something with it, though. There was always something else to try out and wirework was already becoming more difficult for me.
When it started getting really hard on my thumb, however, I knew it was now or never before I wouldn't be able to do it anymore at all. It had been a while since I had played with copper and it felt so good, but it took a lot of breaks to get my octopus finished 
over the next few weeks.

Talking of breaks ... when I was finally done and wanted to take the octopus to the kitchen to oxidize it, I missed that the shark, which had been in the same box, got tangled in some still loose wire ends. Yes, you have be quite stupid not to notice you are holding two things, but sometimes I am.

It could have fallen in the hallway on the one vinyl floor I have, but no, it fell in the kitchen, on the hardest of all my floors.
You know how some things seem to be happening in slow motion and yet it's impossible for you to do anything about them? Like the time I cut my finger and fingernail with the bread knife and my brain only woke up and told me not to cut there when I had already started bleeding like crazy.
There wasn't a chance for me to catch the shark before it hit the tiles and pieces started jumping. The nose and the tail had broken off (seems to be a thing, the same happened to my friend with her dolphin). I could only find the nose and part of the tail, though.

It may sound ridiculous to you, but I was devastated.
I couldn't replace this shark, no matter how much I looked around. There were a few lampwork sharks, both pendants and figurines and they were pretty, no doubt about that, but none of them had this elegance, none of them spoke to me.
I didn't even want to look at the octopus anymore which says a lot.
Then something unexpected happened and yes, I'm totally saying this as a cliffhanger.

See you for part 2, I hope!

5/30/2025

Tackle that stash - A handful of hearts

This is just a short post.
Hearts are probably boring you by now, but I offered to make a bunch of simple ones as gift for children.
The bonus for me is that I can use some leftovers and try out patterns.
Mostly I'm showing you these, though, as an addition to the Tuesday post because that is just what I meant when I said I needed to make it work for me.

I hope these tiny hearts will make children smile a bit when they get them as a surprise, and while making a small piece  which can be finished rather quickly 
every, now and then - although there have been moments when I seriously doubted my counting skills (up to 8 beads in some rows! ðŸ˜‚) - may not be super creative, it's something. Sometimes a little something just has to be enough.


No worries, though, it will not be all hearts from now on. Even if I plan to move along the color wheel some more, I'm not going to make look at all of them, promise.

3/30/2025

Nadine's private island

You may not know that I'm a huge fan of David Zinn. If you are on Facebook or Instagram, YouTube or TikTok, I'm quite sure you have come across his work before.

A little warning or apology now. I love David's art so much, but I don't know if I will be able to find the right words to explain that. Sometimes I'm full of words, but not the right ones come out. Please also keep in mind I'm not a native speaker. Both of that together may be leading to something that totally makes sense in my head, but not so much written down.

This is from David's website:
"Now, thanks to the temptations of a box of sidewalk chalk on an unusually sunny day, Mr. Zinn is known all over the world for the art he creates under his feet. David's temporary street drawings are composed entirely of chalk, charcoal and found objects, and are always improvised on location through a process known (to almost no one) as "ephemeral pareidolic anamorphosis."
According to his TEDx talk, this isn't what he calls capital A Art, but small a art.
It's art that doesn't last for long, art that requires you to look at it from a certain angle to get the picture right, art that is inspired by detecting a meaning or picture in something that originally has nothing to do with it, like seeing something in a cloud that makes sense to your mind, a cow or a car.

We all know the last one. I regularly see faces, dragon heads, and more in my bathroom tiles and it doesn't worry me as long as they don't start talking to me out loud.
What I have never done, however, is work with that pareidolia and use cracks, lines, chewing gum spots, leaves, bushes or metal covers in the street to create something funny, whimsical, heartwarming. I have made a few jewelry pieces that started as a kind of doodle, for example a piece of bent wire, and turned into something recognizable, but not that often. I play, but the results are mostly abstract.

David, however, is sharing a world of creatures with us -
like Sluggo, the green monster with the stalk eyes, or Philomena, the flying pig, gnomes and trolls, bunnies and dinosaurs, dragons and hamsters. All of them are adorable, even the grumpy ones, often their fears and joys and quirks are very relatable, and sometimes I feel like wanting to hug or talk to a piece of street art. I know I'm not alone in this because although I try to follow my own advice to never read the comments on social media, there are posts where I know the comments won't be a dumpster on fire and they show how much these little creatures speak to people.

One of my regrets is that I will never see one in person. David shares not only his art in pictures, but also does videos of how his creatures come to life, and there are books, prints, calendars as well which is wonderful, but no matter how good a picture is, I don't think you get the exact same feeling from them.
Of course one point is the idea of stumbling upon it unexpectedly. In one of his books, David says that usually only a few dozen people get to see his original art, festivals or events obviously being an exception to that. That's no surprise if you see people running along without looking around them, myself included, no doubt (except for the running part, my walking slowly should give me a slightly better chance).
There was a time when I consciously looked up on my way home and noticed stained glass windows, initials on houses, even mosaics that I hadn't seen before. I don't think, however, that I look at the ground too consciously while walking but only if I'm sitting somewhere, and of course these days I don't get around much, anyway.
So how big would my chances be to even notice art that doesn't jump right out at me like a big wall full of graffiti, for example?
The other point is that in the pictures you mostly get the right angle from the start and you don't have to discover it yourself. Would I even recognize what I'm looking at?
Would I see Nadine?

Yes, we're finally getting to Nadine.
She is my all time favorite, a small mouse in a blue dress (here you can find just a few pictures of her). David calls her "a mouse of adventure".
Nadine makes friends without reservations, like cats, big frogs, sheep, Sluggo, and even dragons and the Chalk Ness Monster.
She likes adventure, but she also enjoys quiet and solitary times with a book or a nice cuppa.
She tends to plants, she uses a crystal ball, she dances, and she seems to be living very much in the moment, enjoying what she's doing.
I'm a grumpy old cat lady ...
and I think I envy her a little for getting to be Nadine ðŸ˜‰

I couldn't get this picture of her out of my head from the first time I saw it.

"Nadine's Private Island"
With permission of David Zinn

This isn't the only time I have seen Nadine with a book, but this is a really private spot compared to the hammock or the tree.
Don't we all want our own private island sometimes? Especially nowadays? A spot where the world can't touch us at least for a little while? No phone (although my cell phone is hardly ever on, my landline is still going strong), no technology, no neighbors, no noisy cars, just us and a book. I hope there were no annoying boats coming by, but knowing Nadine she probably would have been ready for that, too.

Anyhow, I started getting this nagging feeling of a need and a challen
ge.
The need was wanting to turn this into fan art. The challenge was the decision what exactly to do and how and it wasn't that easy. In the end only embroidery seemed right.
So I grabbed a 9 cm embroidery hoop - as Nadine is a small mouse - and spent a few fun days embroidering.


My palm tree isn't quite as high and I couldn't fit the whole island on, but Nadine doesn't seem to mind.
The leaves were a bit of a problem at first because I had never tried stumpwork before and struggled with the small size. After four or five attempts I finally called defeat and went back to familiar terrain meaning I beaded the leaves instead (taking the artistic license of making them lighter in color because I didn't have enough dark green beads left).

Unfortunately my brass frames are a bit too small to work with the beaded leaves and my wooden frames are too dark for this scene.
I'll find something eventually.


When I was done in the middle of the night, I took a quick and not very good picture, and before I could start overthinking it as usual and chicken out, I sent an email to David asking him for permission to share this piece publicly.
Can you imagine how I felt when I got a reply the next day already? Of course I had hoped for one, but I wasn't sure at all and definitely didn't expect such a quick one. And as you can obviously tell from this post, it was a yes which really meant a lot to me.
To use David's words from the TEDx talk when he told the story of the earless Mickey, I was "childishly happy".


This is just for myself, a little reminder to try and perhaps be more like Nadine sometimes. I'll let you know how it goes
😉
Also I'm sure I will never not smile looking at her.
3/21/2025

Tackle that stash - Tears of the Jewel Dragon

Sometimes I'm surprised myself when checking for the age of things in my stash.
I still remember ordering two large dragon eyes very vividly because it was so hard to decide on the size and color. Back then I hadn't even
given the faintest of interest to off loom beading or bead embroidery and didn't really know what to do with them, especially not with such big ones, but they looked so pretty I couldn't resist.
One of them ended up in a necklace for myself, the first of my very few split loom necklaces, quite early in my bead looming journey. I wouldn't do it like that anymore now, but the necklace has survived my regular "sessions of destruction" so far, instead it's hanging on my wall as a reminder of my first SLN experiment which I don't think I could repeat.
What really surprised me, though, when I looked it up in my purchase history was that I had bought the eyes on June 2, 2013 - the seller is still active, by the way, the price hasn't even gone up that much, but the postage sure has, no surprise there - and shared the finished necklace on my blog on June 28. That was pretty quick given the time the eyes would have taken to get to Germany from the US.


As you can tell, I was not so quick using the second eye which had to spent more than 11 1/2 years in my stash drawer!

For a Crafternoon - a virtual meeting with some blogger friends for chatting and crafting - I needed a project and spontaneously chose the dragon eye for bead embroidery.
To be on the safe side, I usually bead a bezel for my cabochons, so the start was easy.
Of course, I wasn't the only one to be reminded of Sauron's eye. The yellow is missing, but this wasn't the path I wanted to go down, anyway. Only what path it should be instead, was beyond me at the time.

For the next meeting two weeks later, I pulled it out again, bezel finished by now.
My favorite way to come up with an idea is to hold the cab up every, now and then and stare at it, sometimes over a few days, and then rummage through my stash drawers to see if anything is screaming at me - textures, shapes, but mostly colors first.
This time I came across my beloved hexagon beads and my first thought was "jewel dragon". Hex beads in a dark red, a silver-lined red and gold, and black AB for depth and contrast. Seed beads in similar colors for extra texture.
It would be so sparkly and shiny, not Sauron at all.

After I had filled about half of the space with beads, the piece screamed free form. I have no idea why bead embroidery is the one technique that makes me go free form the most. Maybe it depends on how I sew on the beads. If I let them flow into all directions without thinking about a pattern first, it seems to break up the strict boundaries of the cab's own shape and it feels wrong to restrict that flow by making it stay within the same shape as the cab. No rules, just vibes. Does that make sense or is that only in my head?
In that case I don't sew on the beads, cut the edges of the beading foundation, then put on the backing and cut around that edge.
Instead I start embroidering, eventually cut the foundation to a shape that speaks to me and then keep embroidering. Sometimes I even cut some more during the process if it feels right. No rules, just vibes.

It took me some days to get all the beads on, also because I couldn't resist holding the piece up to the light all the time to admire the sparkle which was even more beautiful than I had imagined. I wish I could capture that in the pictures.
With focals as big as this one, I usually prefer some kind of beaded rope, but after trying a few things, straps seemed to be working better in this case.

The necklace was finished, wasn't it? Ah, but those who have known me for a while also know that it's very hard for me to resist a dangle or a fringe, and an idea sneaked into my head.

Now the only question is why the Jewel Dragon is crying ...


12/14/2024

4 x Jack

To some people, San Francisco means the Golden Gate Bridge, the Painted Ladies, Fisherman's Wharf, cable cars, and the Fairmont - just the first few things that popped into my head - but when we first made it to the USA, to the ex and me it also meant FAO Schwarz whose connection to Steiff was famous among collectors thanks to some special editions.
On our first visit there, we didn't have that much time which was 
probably better for our bank account. Through FAO Schwarz we got in contact with a lady who had done some Steiff repair jobs for them, and when we came to San Francisco some years later, we went there again, with the lady who had by now become a good friend.
Oh boy, we were like kids in a toy store. Wait, we actually were in a toy store ... Okay, we were big kids for sure. We really tried to be good, but you know how it goes sometimes.

Of course we had expected to buy some Steiff, but then we also came across Jack, four to be precise, and couldn't resist.
It was a set of four Jack Skellingtons from "The Nightmare Before Christmas" - one in his striped suit, one as the scarecrow with the pumpkin head, one in his pyjamas (his book is in a different cabinet right now, one of my Kens is reading it to my Skippers and other family members ;-)), and one as "Sandy Claws" in a Santa suit.
For those who have never seen the film ... Jack, the Pumpkin King, is the king of Halloween Town and he's bored and struggling from having to prepare Halloween over and over. By chance, he discovers the door to Christmas Town in the woods and he's overwhelmed with joy about this wonderful holiday. Despite the warnings of Sally, the rag doll who is in love with him, Jack decides to have Santa kidnapped, so he can take his role. He includes all the inhabitants of Halloween Town to prepare Christmas in their own style.
Things don't quite work out the way he had hoped, though. Children and parents are shocked by gifts of shrunken heads and monstrosities and the military is called in to shoot Jack down.
Meanwhile the little monsters tasked with the kidnapping by Jack have taken Santa to their superior Oogie Boogie, a bogeyman playing with Santa's life - and Sally's because she has tried to resuce Santa.
Jack gets shot down and is depressed about his failure for a bit, but then he finds this is giving him great new ideas for next Halloween. He returns home and rescues Santa and Sally by defeating Oogie who loses his sacklike shell and falls apart into a load of bugs.
Santa hurries to save Christmas, but also lets it snow in Halloween Town to show Jack he has forgiven him.
The film ends by Jack and Sally finally declaring their love for one another.

Here's a confession, the movie is not on my regular Christmas watch list. Although I'm fine with musicals in general and really love the songs "Jack's Lament" and "What's This?", it's a bit much singing for me here for a movie running only 76 minutes (I can't watch "Frozen" for the same reason, but that's a different story).
So I only watch it every few years and this year it was time for that again.
I'm totally in love with Jack, however.
I even designed a bracelet with him, but it was more fun to hang him on my wall than leave him in a jewelry box or drawer.


It has been a long time running joke with a US friend of mine that I should send it to her. I just can't part with him, but made a little something for her instead, a tiny beaded bottle.


My four Jacks are sitting behind glass at the moment, but I'm thinking I should put them on one of the cabinets der Dekan can't get to. They would look pretty cool up there.
I took them out for a photo shoot and found that Santa Jack had a dislocated arm, probably from tree hugging. Luckily, it was easy enough to snap back in.


Tree hugging? Well, when I decided to buy a little tree because Ponder was old enough to be a good boy around it, my sister suggested making Santa Jack the topper. I loved the idea and Jack protected the tree for years. See how excited he was to say hello to Ponder, and Ponder, despite being the occasional ornamentnapper, never did anything to Jack. I miss my big boy so much.


I'm sure that in about 30 or 40 years Gundel and der Dekan will have become calm enough to be as nice to the tree as Ponder was.
What do you think my chances are for that to be happening?
At the moment my bet is on 0% because der Dekan has been jumping around and into the tree for almost an hour now!

1/24/2024

Another bead soup story

"Bead soup doesn't scare me." I wrote that in the post about the winter comet ornament in my advent calendar.
Not even if it's ten years old, actually probably even older because I mixed it in my early bead looming days,
for a project that never happened.
Every, now and then I picked beads from it, for the winter comet and for a pair of white elephant earrings, for example.

It was time to empty that little tin and I did it.
I had already had the plan to try out folded peyote earrings in a bead soup and a smaller size than the last ones, and I managed to use up the whole soup with the addition of a few more of the silver lined crystal beads.
I made four folded peyote components in two different sizes and turned one pair into earrings by hanging them from little beaded hearts.


Then I started playing with the second pair. I thought I could do something new with them (new to me, just because I haven't seen it doesn't mean it doesn't exist). After breaking off a few end beads I could join the two components with beads and turn it into a folded peyote diamond.
Now what?
Well, in the same tin there was a little spike thingy with crystals that I improvised a few months ago and had just turned into a dangle with some crystal rondelles a few days before.
I attached it to the diamond and actually like it. It has a kind of archaic fantasy look to me now. What do you see in it?

12/09/2023

Winter comet - The ninth door


The puffy star is back!
It all started with a large tube of bead soup, at least ten years old. I know many beaders hate bead soup, but I'm Swabian, and throwing beads away would feel like ripping my heart out, especially Delicas. I couldn't think of anyone to give it to, either.
It was easy enough to pour out the whole soup and pick out just the beads needed, though, mostly clear ones in this case. Bead soup doesn't scare me.

At first I had wanted to try something that didn't work out the way I had hoped, like so often, so I ripped it up again and made a winter comet instead, or maybe an ice comet.

The web tells me that comets have two main tails - gas and dust - and a coma.
Well, this comet has a baroque pearl and quartz tail because gas and dust are very hard to make from beads. Also a comet doesn't look like a puffy star, but artistic license and fantasy do wonders.
Just don't tell NASA about it.

12/08/2023

Candy cane - The eighth door


First let me say that for me candy canes have never been a part of Christmas although I knew about them of course. Spontaneously I can't even remember ever having seen one in person although they are surely sold here as well.
Nevertheless - or maybe therefore? - a candy cane seemed a good choice for an ornament.

There are probably loads of beaded candy cane tutorials around, but I felt confident about not needing one of them.
As a technique I chose my beloved Herringbone stitch with a round of eight seed beads each although I knew the curve at the top would look squished and weird if I tried to keep the rope round. Four seed beads would have been better, but too small for an ornament, at least for my liking.
Even if the cane is flattened now, it still looks good - that's just my personal opinion of course.
To distract from the shape a little, I chose to add a small beaded holly bow.
What do you say, does it work?

12/05/2023

Beaded candle - The fifth door


I own real candles, but can't remember when I actually lit one the last time. I never trusted (some of) my cats around open fire that could be knocked over.
The two candles on one of my cupboards are constantly crooked because one or the other tail keeps hitting them.
So instead I have fake candles with a wax surface and LED "flames".
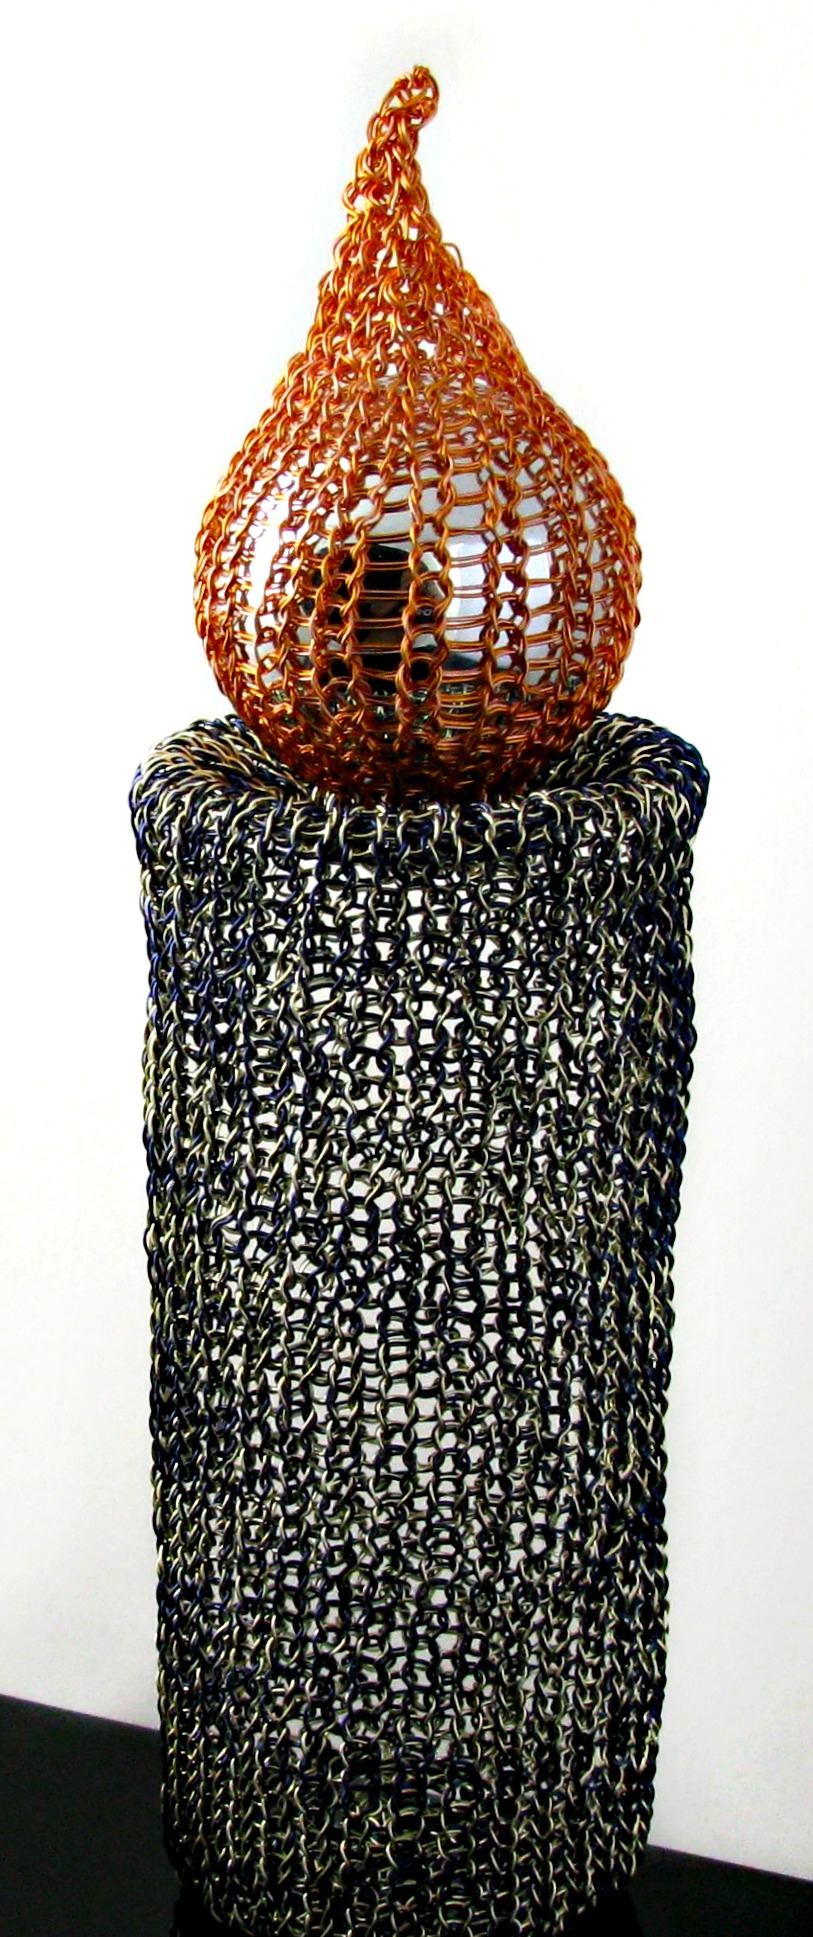
When I started wire knitting, I also gave some candles a try. The long ones that I made first are difficult to put up because they tend to bend over, wire crochet would probably have been sturdier.
I also made a bigger one that stands well on its own, though, as it is wider and made from two wires. To make the "flame" shine, I put a small Christmas bauble inside. These pictures from a previous advent calender give you an idea of its size.


This time, however, I wanted a beaded version.
I used 8° pink lined crystal seed beads to bead around a small wooden dowel in peyote stitch. Two layers of metallic golden seed beads and a disk at the bottom make up the little candle holder (actually I had run out of the pink beads and had to think of something, but this is supposed to be a bit of challenge after all).
A flame of red and a very light transparent brown and voilà, here's your Christmas candle!
It can stand on its own or can go on the tree.

12/01/2023

Little star - The first door


Welcome to this year's advent calendar!
As announced yesterday, it will be different from the last one.
Throughout the year I took some time from my regular creating to make Christmas and winter items and I will share one every day.
There will be no stories or traditions unless an item has been inspired by one in which case it will be told, and if I chose to try out a tutorial, I will of course share that, too.
I hope you will enjoy my crafty advent calendar.
Let's start this!

Stars - they are always there, but play a special role at Christmas.
This little star was supposed to be a break from the puffy stars. It's definitely flat! ;-)
I used a shimmering transparent purple for the five brick stitch rays. As you can imagine, the shape wasn't holding up very well by itself, so I spontaneously glued and sewed it to some embroidery base and added Ultrasuede backing.
Still the star looked too simple, so I gave it a small shiny edging as well.
Isn't it cute now?